 |
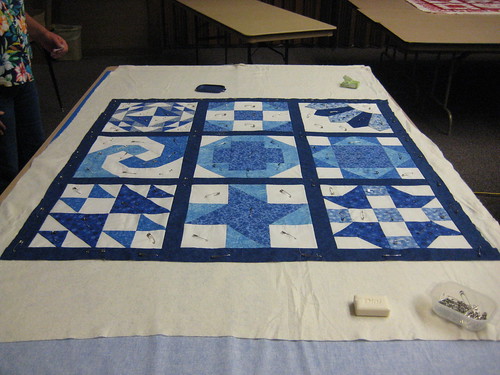
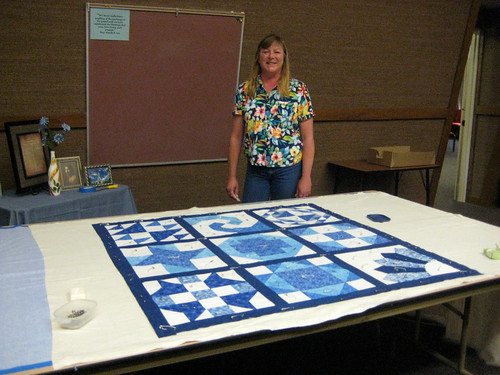
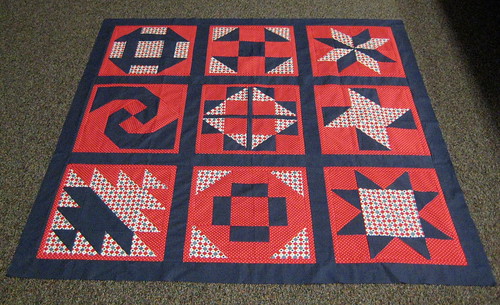
| Teri Williams Quilt |
We got together this morning for our monthly meeting of the Newby Quilting Bee. Today we learned how to make the quilt sandwich and pin our quilts.
So to begin, you need to measure your quilt top. Then you need to have enough batting and backing to go 3-4 inches beyond your top. If you are going to be having your quilt, quilted by a longarm quilter, they will instruct you how much additional fabric and batting you need beyond your quilt top for their purposes. So, check with them first! If you are quilting for yourself, on your table top machine, then this will be sufficient for our purposes.
Make sure you have pressed your top and your backing so that they are wrinkle free. We pushed two or three tables together to avoid having to get down on the floor and pin our quilts. You may want to do this at home as well. Folding tables work fine, you don't have to worry about the pins scratching your good dining table. If all else fails, you can use the floor, you have more stamina than me...LOL.
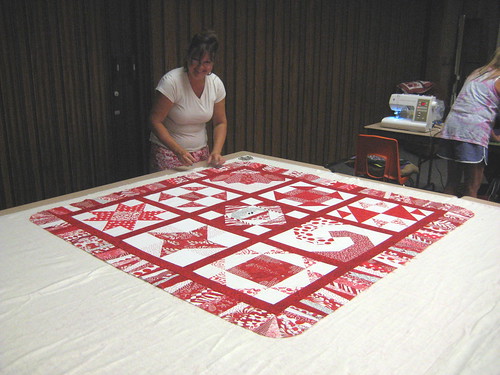 |
| Brenda Allen's Quilt |
First, lay your backing fabric down with the wrong side facing up. Take your masking tape and tape the edges of your backing to the table so that it is snug and wrinkle free. Don't stretch it, just smooth and wrinkle free.
Next, lay your batting on top of your backing fabric and start to smooth it from the center out to the edges. Depending on the type of batting you are using, you may or may not have to tape it as well. Some of the high loft battings will do better if you tape them. If you are using a "Warm and Natural" brand you can just smooth it and it will be fine without taping. Now don't freak out if you bought a huge piece of batting and it is way beyond your quilt, you will trim it in a bit, but not yet.
Now, lay your quilt top on the smoothed batting. Again, starting from the middle of your quilt top, smooth your top from the center to the edges. When you have completed this process you are ready to pin your quilt.
SIDE NOTE #1: See Brenda's cute border on her quilt above? Well, she was worried about the strips coming apart as she worked on the quilt top. The easy solution is to topstitch 1/4 inch from the edge all the way around and that will stabilize those edges.
When you purchased your batting, it would say on the package or the bolt end, how close you need to quilt. When you are pinning, think about what kind of quilting you may be doing. Stitch in the ditch? Stitch next to the ditch? Echo quilting? Lay your pins out so that you are not having to stop every five seconds and remove and replace pins as you quilt. Using your safety pins, pin through all layers. I like to pin about every 6 inches or so. You want it to be secure so that as you are wrestling it around and quilting, you will not have things slipping.
 |
| Teri's Pinned Quilt |
 |
| Janeal, Brenda and Shirley engrossed in their decisions. |
 |
| Ramona Smith's Quilt |
 |
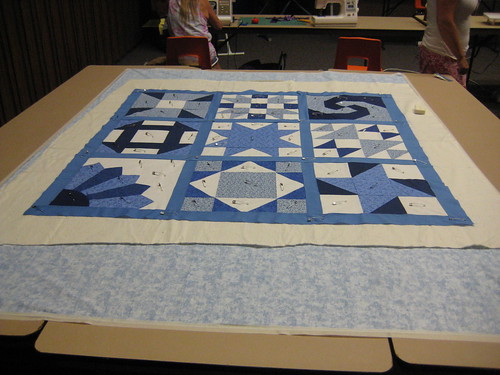
| Shirley Statham's Quilt |
Shirley Statham had a good friend who is a quilter and helped her to deal with odd sized blocks, she simply bordered around each one with a thin strip and then cut them all to the same size and continued on, it's beautiful! Shirley has been going to town on her quilts and has finished 3 already!
We will meet again on August 24th to start quilting! Bring your quilt sandwich, your sewing machines, fresh needles, your quilting thread and plenty of bobbins wound with your backing thread color, scissors and a container to place your pins in as you remove them. You will not need your cutting mats or rotary cutters for this meeting.
Let's talk about thread. If you are stitching in the ditch and do not want your thread to show, I would suggest you get a clear poly quilting thread. Here is a link for Superior Brand. You can find this at most fabric stores and it's available online as well. http://www.superiorthreads.com/product/Brand/monopoly/
Here is another link which offers several brands. http://www.redrockthreads.com/misc-thread/invisible-thread.asp
And a link for Aurifil. http://www.aurifil.com/Aurifil/Invisible_thread.html
Get a poly rather than a nylon thread.
You will only use this thread in your top, you will use regular thread in your bobbin. I can't stress enough that you load several bobbins, nothing is more annoying that having to take everything apart to wind a bobbin, just when you are getting in the groove.
It was a blast today, seeing everyone's quilts and I am so excited for our next meeting. Oh! One more thing. Please bring a little sandwich to practice on before we turn you loose on your quilt. A piece of fabric about 12 x 12 inches with batting and backing as well, will be fine, use an extra block or bits of fabric that you have sewn together so we can practice the stitch in the ditch and others.
they look fantastic. great blocks and love choices of fabrics/colors that were made
ReplyDelete