It would not be Christmas at our house if I did not make Pierogies. This is a family recipe from my Grandmother who was Ukrainian and came over from the old country. She has been passed for almost 50 years now. The photo on the top is how I remember her just before she passed, the photo on the below is her wedding day to my grandfather.


I remember as a little girl watching her make these at her kitchen table in their little apartment on St. Marks Place in New York City. She would roll out the dough so thin and carefully cut the noodle dough with a drinking glass, then deftly stuff the pierogies with all kinds of incredible stuffings. My favorite was her potato pierogi but she also made cabbage and cherry stuffed pierogi that were equally delightful. My mother, thank goodness, decided that she needed to learn how to make them for her husband. I don't remember my mother making them very often, but the one thing she did, which I will be forever grateful for, she made notes of the recipes and I have those today. I have made some changes in the filling to suit my personal taste, but otherwise they are authentic.
You will need the following ingredients for the stuffing which you will make ahead and refrigerate:
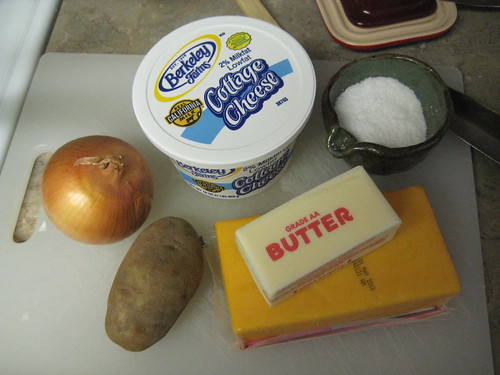
My grandmother made hers with farmers cheese, a little hard to find out here, so I substitute cottage cheese.
3-4 potatoes cooked and mashed
1 medium onion, finely diced
6 Tablespoons of butter
salt and pepper to taste
2 ounces of cheddar grated
melt your butter in a pan and get your diced onions sauteing over low heat, they need to be browned but not burned.
Make a slit around the middle of your potatoes and put them in the pot, cover with water and let cook, when they are done you can just slide the skins right off and mash.
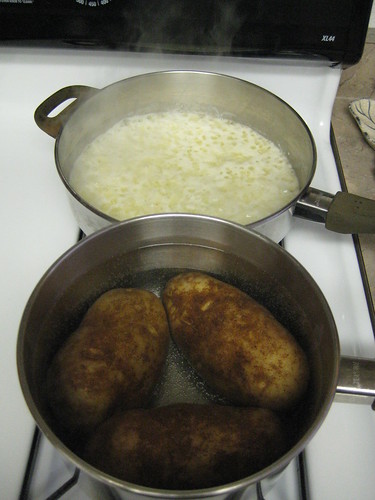


While all that is going on, you can grate your cheese and measure out 3/4 cup of the cottage cheese. Once your potatoes are done cooking and you have mashed them or riced them, you will add in your cheeses, salt and pepper to taste and your buttered onions. Mix well and refrigerate to cool. Don't try to make the pierogi with hot filling...you will just have a mess on your hands.


Your finished stuffing should look like this above.
Okay! Stuffing is cooled and we are ready to make the pierogi!
I cheat, I use a pasta roller to get it very thin, up to a #7 on the dial. I can't roll as thin as my Baba did. To make the noodle dough, you will need:
2 cups All Purpose Flour
2 egg yokes
1 tsp salt
1 Tbsp oil
a mixture of 1/2 water and 1/2 milk added a Tbsp at a time. About 8-10 Tbsp.
Place your flour in a bowl, add your salt, mix.
Make a well in the flour and add your 2 egg yolks, reserving the whites for later.
add your oil and 4 Tbsp of milk and 4 Tbsp of water.
stir or mix with your hands until it is incorporated and holds together in a ball (you can do this in your food processor if you wish) Add additional milk and water as needed to have ingredients hold together.
Knead on a lightly floured board for 2-3 minutes until smooth, then cover with a bowl or a towel for 30 minutes to rest.
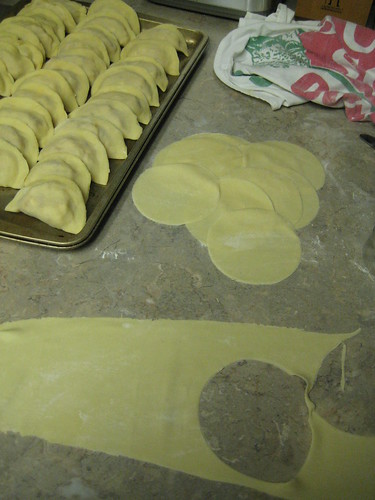
Cut into four pieces and keep the unused portion covered until you are ready for it. Run the dough through your pasta machine starting on setting 1 until you get to 7, flouring lightly as needed to prevent sticking.
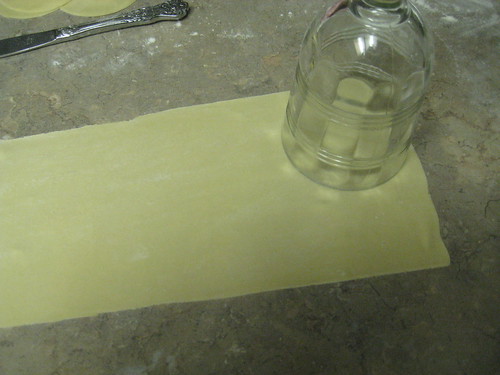
lay your noodle strip out on the board and cut with a glass or a cutter the size that you like. (a large mouth mason jar ring work great!) save the left over pieces of dough to re-roll, keep them covered.
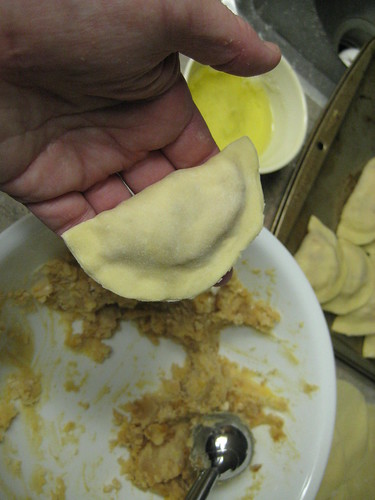
Take a round in your hand and using a cookie dough scoop (or a teaspoon) place the stuffing in the middle, dip your finger in the egg white and just run over 1/2 the margin of the dough. Then carefully fold the dough over and pinch the edges closed.

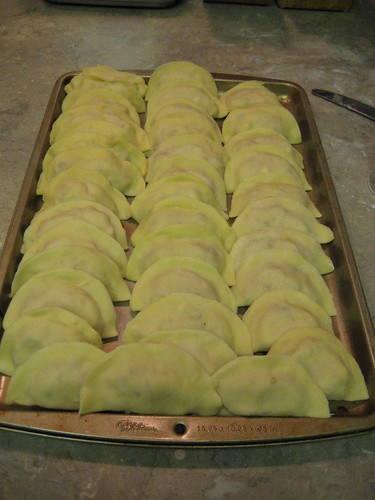
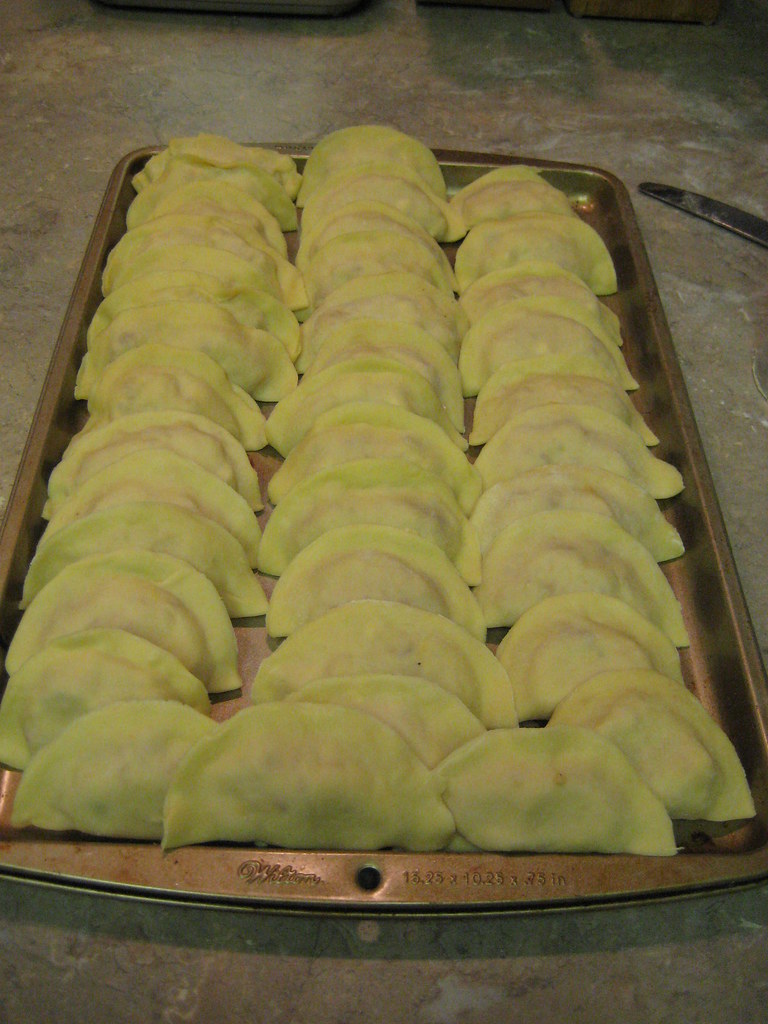
You will want to lay your pierogi out on either a cookie tray or a towel that is floured so that they don't stick. I lay mine on a cookie sheet, they are stacked for the photo, but you lay them each on the tray, not touching another and freeze them, then put them into plastic bags to use as you wish.
To cook them. Bring a large pot of salted water to the boil, turn the heat down to barely a simmer. Carefully place your pierogi in the water and cook until they rise to the top. Then, in a separate pan, saute up minced onion and butter, then place your cooked pierogi in the pan and brown them in the onion butter. Serve with a large dollop of sour cream! Heaven on earth! If everyone ate pierogi, I can guarantee you there would be Peace in the World!
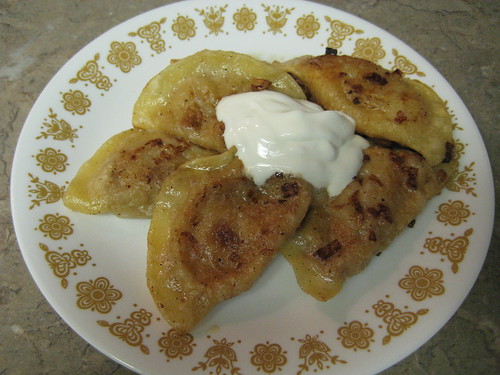
Couldn't wait until Christmas to try just a plate full. I'm happy!
