
Kings Crown Block
Corrections to measurements when cutting your fabric for your block below!
This is our 4th class now and our 5th block! The Kings Crown Block incorporates 4 flying geese around a center square that can be creatively developed as a focal block. You could fussy cut a fabric for the center, your could embroider, applique, you could even piece the center as Brenda has done below. She has used a paper piecing method which we will discuss in class a bit.
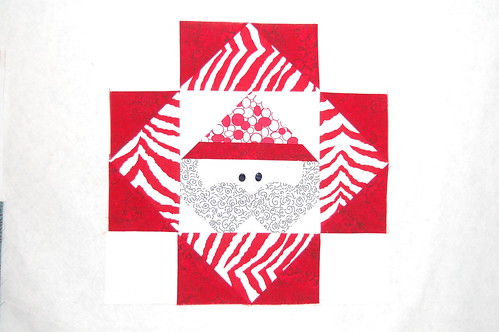
Where you place your fabrics, as we have discussed in previous blocks, will create the emphasis. So let's get started!
There are several tools and techniques out there to make flying geese. Here are some of them.
This first one uses the Lazy Girl Flying Geese X 4 No Math Ruler. Good Demonstration, easy to do.
The next one demonstrates the Eleanor Burns method and rulers. Also easy and fun to watch.
These are both great tools and wonderful methods...if you need those sizes.
Now here is a method by Ricy Timms which is truly amazing and fun, one seam and you can make it the size you need for your project!
In addition to the methods listed above, you can also paper piece your flying geese, templates can be obtained online at http://www.quilterscache.com/B/BlankPPTemplatesPage.html I don't suggest this for a beginner.
Excellent tutorial link here: http://www.quilterscache.com/H/Howtomakegeese.html
I do not recommend her method #1 for beginners as you will be working on a raw diagonal and there is a risk of stretching your fabric and having a disappointing outcome.
We will be using her method #2. Her method #3 is actually demonstrated in the video at the top and I will demonstrate that in class as well. You can make them anyway you like...like I said at the beginning, there are a number of roads and they all lead to the same place!
To make the Kings Crown Block, you will need to cut the following:
4 squares measuring 4 1/2" square for your corner stones.
4 rectangles measuring 8 1/4" x 4 1/2" for your flying geese body
8 squares measuring 41/2" x 41/2" for your flying geese wings
1 square measuring 8 1/4" x 8 1/4" for your center
Set aside your corner stones and your center for the time being. We are going to make four flying geese.

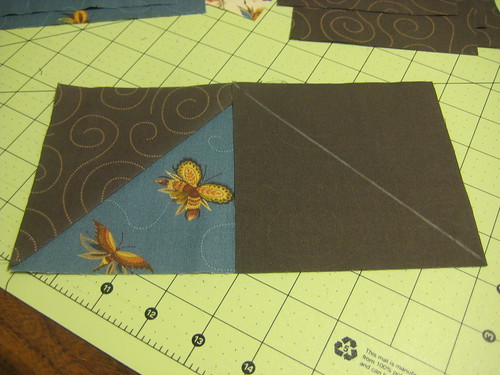
Lay your "wings" on top of your "body" as shown, fabric right sides together. Draw a diagonal as shown.
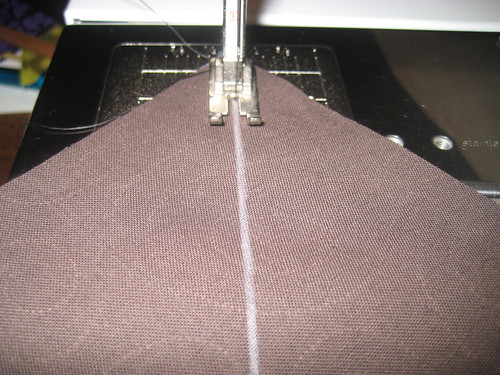
Stitch on the diagonal. This is a relatively thick chalk line so you can see.
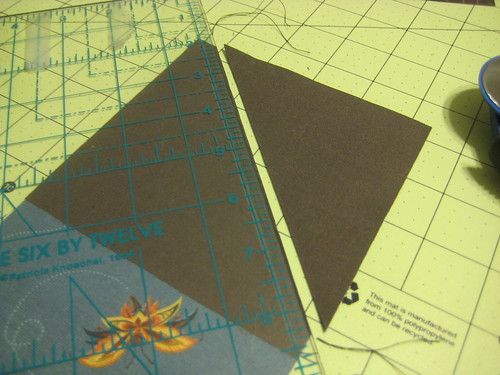
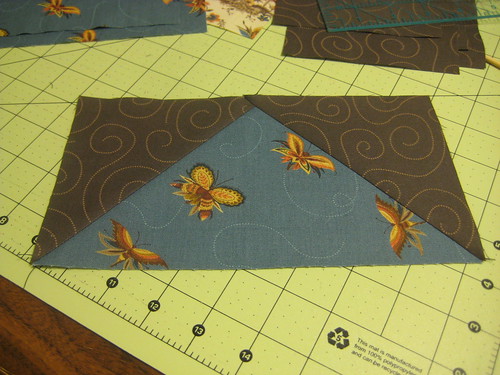
Using your ruler, cut 1/4 inch away from your stitch line as shown above.
Press open as shown. You have completed 1/2 of your geese block.
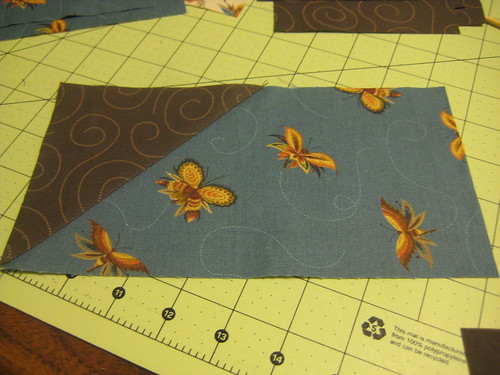
Do the same for the other side as shown above.
Trim and press open as you did for the first "wing". You now have a finished flying geese. You will need four of these for your block.

Lay your block out with the large square in the center, your small squares in the corners and your flying geese in between...they can point in or out, your call. Stitch each row together as you have been taught in lesson 1 and your block is complete.
Now, as in our previous lessons, I want you to think outside the box for a minute. Before stitching your block together, play with the components, what do you come up with? Here are some different blocks, made with the same bits.


Lots of variety here! Again, I encourage you to experiment, let your creativity fly. Do you love to embroider? Maybe an embroidered focal piece in the center would be fun. Some iron on applique, or stitched if you are so inclined. Fussy cut a focal piece. Use diagonal fabrics in your flying geese as Brenda has done, to give additional interest.
Okay, We are moving right along.
Our next meeting will be on May 11th at 9am.
We will be having another surprise that day, so I hope you can make it! If not, please join us online and quilt along with us.
If you are inclined, please pack a sack lunch, refrigeration is available...we will stay in the afternoon and you can work on your project or help with a charity quilt!
Our Next Block will be a 5 blade Dresden Fan! So much fun to make, so quick and easy with lots of creative variations for you to try.

No comments:
Post a Comment