
Here we go! You have pre-cut your pieces as instructed and we are ready to sew this block together!
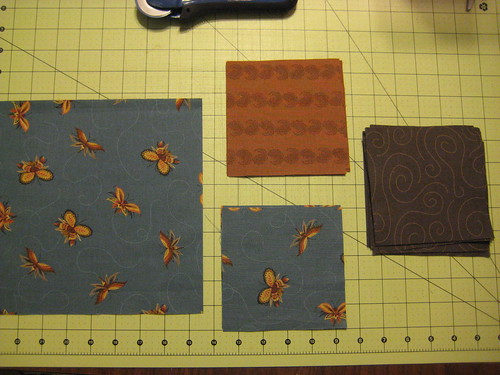
We are going to chain stitch today. This is a great technique and you can benefit by looking for opportunities to use this technique when you are making other quilts.
Take one 5" square of your primary fabric color and place it right sides together with a 5" square of your background fabric. Draw a line diagonally across your block on the wrong side of the fabric. Do this two times! Stitch a scant 1/4 inch from the line you drew, on both sides of that line. Do not break the thread as you stitch, just insert the next block and continue stitching...when you get to one end, lift your pressure foot, pivot and head back down the other side. You should have something that looks like below.
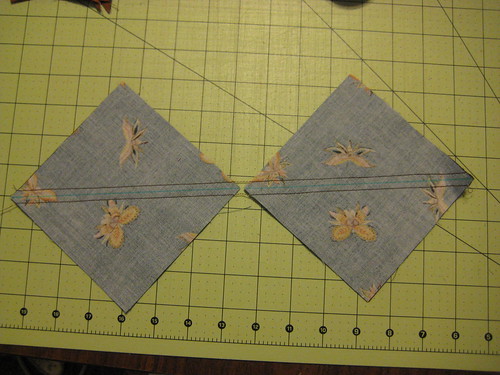
Cut these apart and then cut them using a rotary cutter and ruler on the line you drew, as shown below.
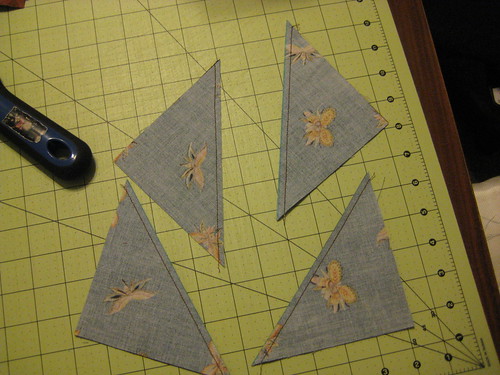
Press Open.
Look at the photos below first before you read the directions, they will make more sense.
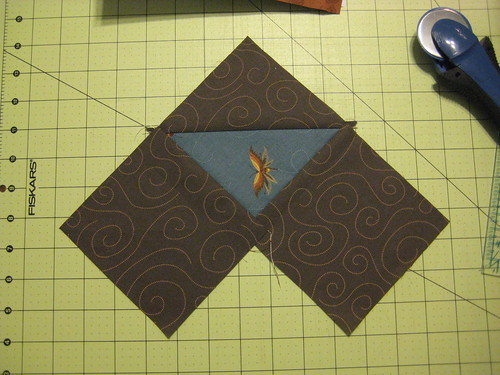
Now, on ONE side of your half square triangle, I want you to stitch one 5" block...it's going to hang over, so line up your edge with the outside of your half square triangle. Make sure that your feature fabric is placed as shown below and your background fabric is to the outside. If you are sewing background fabric to background fabric, you have your placement incorrect, check it twice, sew it once!
When you have one "wing" on, then I would like you to line up another square on the other side and do the same as above, make sure to line up your block on the outside and overlap in the center! Your piece should look like this below. Press open. You have started component #1
Reach into your pre-cut fabric packet and pull out your large square. Cut that in half on the diagonal and take one of those pieces and place it on top of component #1 as shown below.

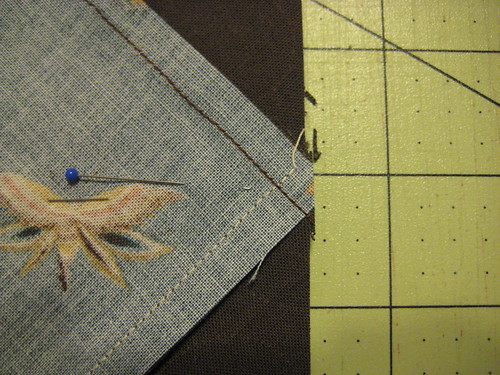
Now line up your ruler on the diagonal and trim off the excess fabric, your piece should look like this below when you flip it over. We are going to place a few pins and sew carefully, not to stretch this seam as it is on the bias.

When you are pinning, I want you to place the pins away from the seam so you don't have to move them and you are not sewing over them. You will stitch a 1/4 inch seam on the long diagonal edge. When you get to the center, carefully stitch so that you are 1 thread width away from the intersection of the pieces as shown below. This is important and will result in a perfect piecing when you turn and press. I have used two color threads to highlight the intersection that you want to stitch right next to.
The example just below is what you are striving for.

When you turn and press this now, it should look like this...

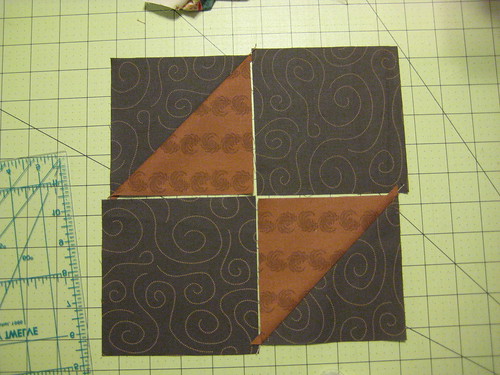
Alright, you should make two of the completed components #1 and set them aside.
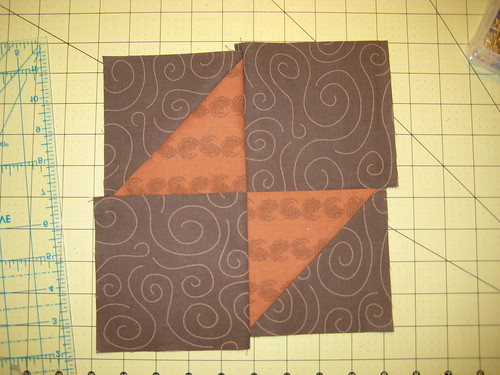
Component #2 is created by making 2 half square units and stitching them together with a solid square as shown below.
Your pre-cut squares will be larger than your half square units. Make sure you line up your pieces and sew them so that the extra fabric is on the outside of your unit and able to be trimmed off. Once your piece is sewn together it should look like this...
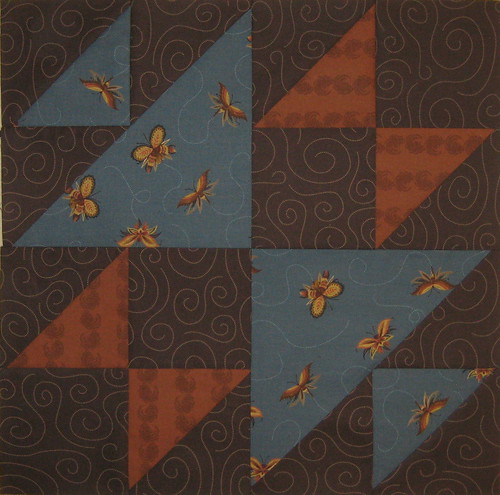
Trim off the excess to square up your block. Measure your component blocks and make sure they are all the same size. If not, trim them to square them up. Place your components on your mat so that they create the Old Maid's Puzzle and stitch your four components together. Stitching first the right pieces to the left and then the top to the bottom. Remember the trick of pressing your steams in opposite directions and squeezing them together so they will meet perfectly. Remember to place a pin next to the intersection rather than in it and you will have a better result.
Your finished block should look like this...
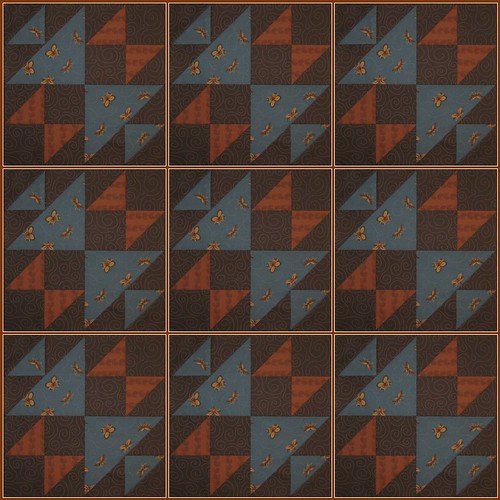
Here's and idea of what a quilt made entirely from this block might look like...
Our Next meeting will be held July 13th. at 9am. We will be squaring up our blocks and starting to sash them together! More information will be sent to you prior to the meeting, so make sure I have your e-mail address!!!
No comments:
Post a Comment