Showing posts with label CS Designs Twister Tool. Show all posts

Saturday, March 2, 2013

Twisting The Day Away!

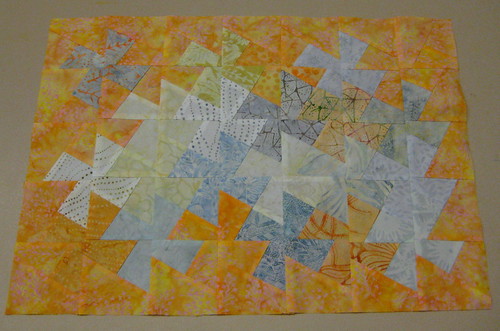
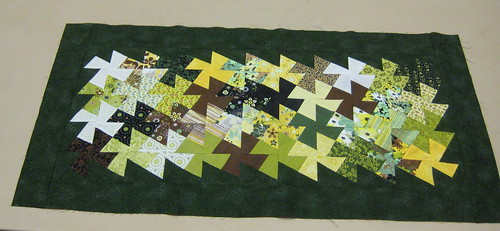
Created by Shirley Statham

Big fun was had by all, with momentary frustration, beautiful creations developed!  Friday some of the gals from our little group got together for an "In Between" class on the Twister Tool.  For some it was a bit confusing at first.  How are you going to get that elaborate design from just cutting these squares?!  As the morning progressed, so did the ah factor.  The first time you make one of these can be a challenge.  The trick is to make sure that you keep your blocks in order.  Once you get the hang of it, you will be whipping them out like crazy!


Shirley Statham
Shirley was a bit concerned as we started out, she has a new machine and so her morning was a bit challenging, but she persevered and her beautiful piece, featured in the photo at the top, just makes me want to take a bite!  It's so fresh and bright!

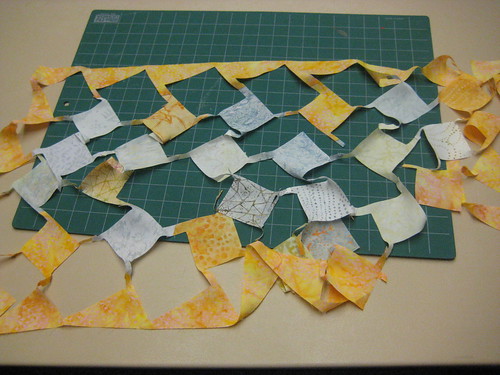
Not much left when you're finished cutting!
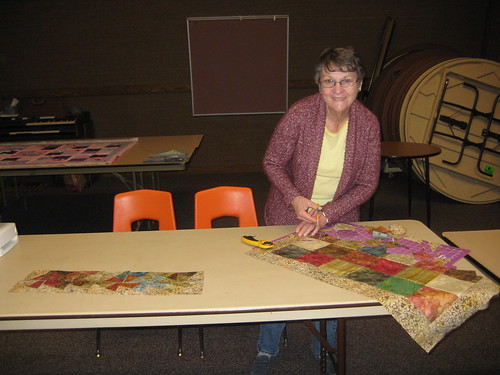
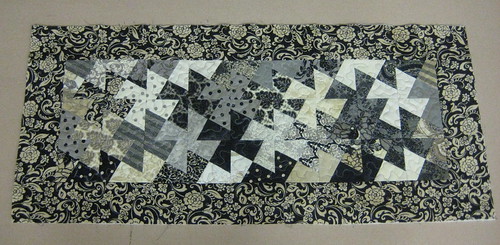
Mavis Hilt

Mavis was just zipping along, she has made one before!  Her lovely batiks are making up into a beautiful table topper!  She is always so cheerful, I love her smile!  She was a big help to the others that were just learning.
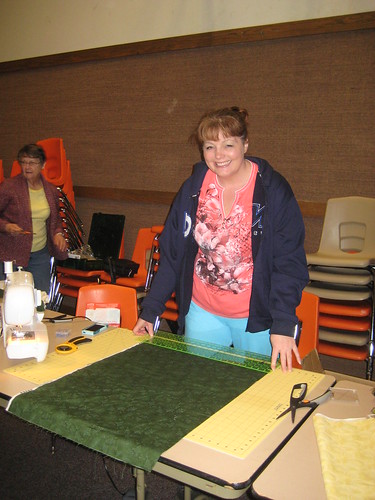
Holly Sear

Holly is a new seamstress/quilter.  She is learning the ropes and having a ball.  Holly is so talented with paper crafting, she is just a natural at picking out fabrics and putting texture and color together.  Her paper trained eye is working well for her in the quilting arena.
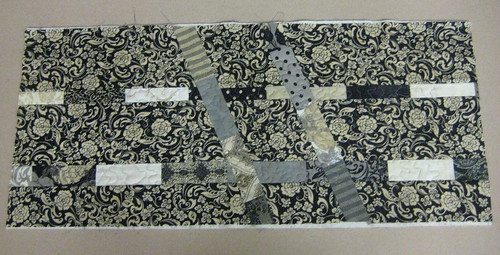
Created by Holly Sear

Below is a photo of Brenda Allen, she is going to be a new grandmother for the first time!  She is so excited.  She has pieced a baby quilt using the Twister Tool and used the left over bits that are in between the blocks to make prairie points.  Here she is sewing those prairie points down with little buttons from her button box!  A sweet quilt for the new babe.
Brenda Allen

I finished up my little demo table runner by taking the left over strips on the outside and inserting them into the backing.  A simple meandering quilting of the center bit and now it's just waiting for the binding.  That will require another trip to the fabric store for some of the black with almond polka dots fabric.  Another day.


Our next regularly scheduled meeting will be on March 15th at 9:00 at the LDS Church.  Come join us.  We will be making two more blocks in our Perfect Paper Piecing series.  I will also announce at that time, our next "In Between" get together where we will be making some quick, easy, fun pouches!


Sunday, February 24, 2013

Twisting The Afternoon Away!


Moda Little Black Dress

This coming Friday, March 1st, I will be teaching a mini-class on how to use the Twister Tool.  We will be making a table runner and there are a couple things you can do at home to prepare for this class!

To make the table runner you will need either 1 charm pack (about $10.00) with 36-42  precut 5 x 5 inch pieces or you will need to cut yourself some 5 x 5 inch squares out of the fabric of your choice.  The advantage to a charm pack is you will have a color coordinated packet of precut fabrics normally containing the entire run for that designer.  No thinking required...you like the colors and the fabrics in the packet, they WILL play nice together.   If you are cutting your own fabrics, I will suggest that you pick lights and darks and alternate them as you sew the blocks together.  Your end result will be a table runner that has pop and appeal.  Any scrap fabrics that you can cut 5 x 5 inches will work, so don't stress over this.  Just have fun with it!

You will need enough fabric for a border and backing along with some thin batting.  

BEFORE YOU COME TO CLASS:  Sew your blocks together.  Here is how I do mine, you can do yours any way you want, just get them together.


First I sort, light and dark from the packet.  Then I randomly sew the lights and darks together, one after another, I feed them into the machine without breaking the thread in between. Clip them apart, press to set the seams and then press them open.


 You will make two rows of equal length this way and then you will sew those two rows together.  Remember our trick of pressing the seams in opposite directions so they nest together when you are matching them up?  This would be a good time to use that trick.  DON'T stress if they are not perfect, it doesn't matter for this project, you will never see it.


When all the rows are sewn together it should look something like this.   Well, hey, that is pretty all on it's own...just wait till we are done with it!  Oh Boy!  Now we are ready to cut.  


If you are coming to class Friday...stop here and bring your blocks with you all sewn together.  If you are at home, or can't wait...well then, continue below.


This is the Twister Tool.  Kind of hard to see, it's clear.  But you will notice it's a square with an offset line in the center.  The tool is by Country Schoolhouse Designs and you can get it here:  Twister Tool  Now there are two sizes, get them both, you're gonna want them!  For this tutorial, we are using the Lil' Twister.  Below is a little video I created to show you how to place the tool on your fabric, once placed you will use your rotary cutter and carefully cut around the block.  You don't want to cut beyond the square tool.


Using your rotary cutter, carefully cut around the Twister Tool.  When finished remove your square of fabric and set it in a place where you can add your next piece to it without having to move your squares.  


'


Once you have cut about six pieces you will start to see your design coming together.  Sew in rows, careful not to move things around.  Check your design.  Add a border if you wish, batting and backing.  Quilt and bind...you have a lovely table runner.  Don't want to bother binding, add your batting and some muslin for the backing, quilt your top and then put a piece over it with the right side of your quilted piece and the right side of your backing together, stitch around all the edges leaving a 6 inch opening to turn and flip it right side out, stitch up your turning hole and you have a lovely table runner.

Borders - you can put them on before you trim your blocks or after, your choice, it will give you a different effect either way, both are lovely.  Save your extra bits that are left over, they can be used in other projects.  

Your finished piece for your table runner will be about 27" long.  You can decide how big you want your borders from there.