Showing posts with label Newby Quilting Class. Show all posts

Wednesday, March 21, 2012

Newby Quilting Class Update and Upcoming Local Quilt Shows!


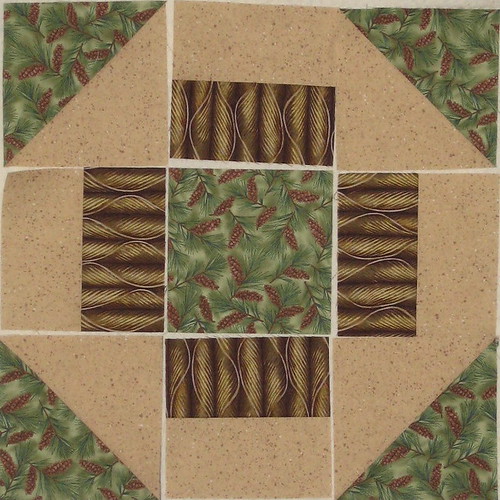
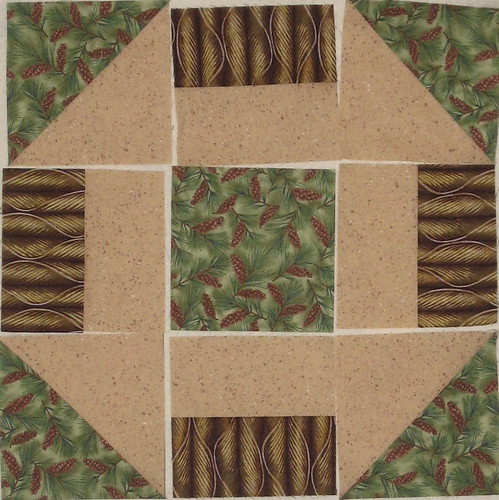
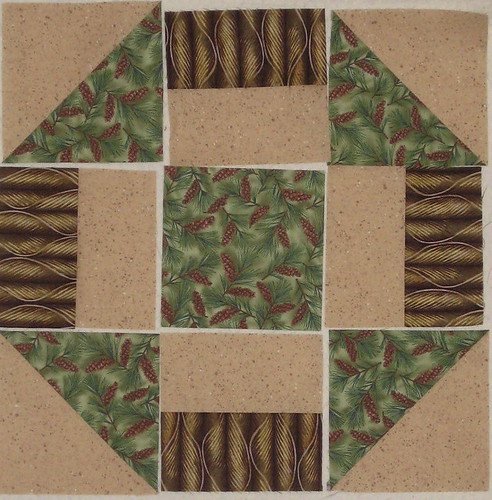
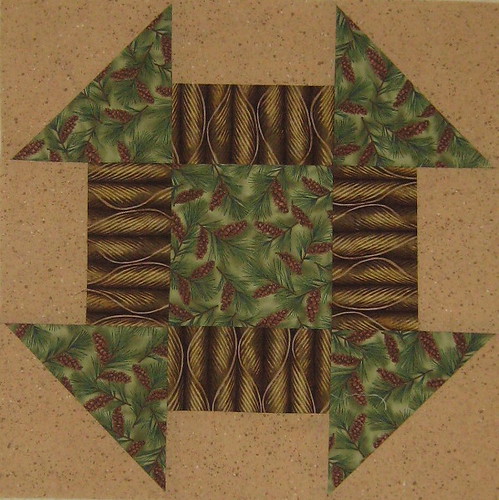
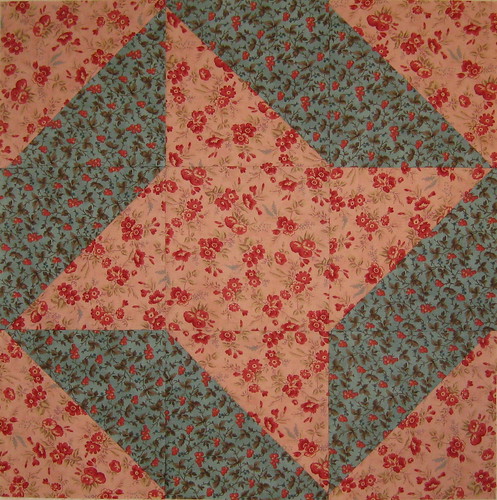
We are getting ready for our next block and I want you to see Brenda's block which she has finished ahead of time.  She will be using this for the center block in her quilt.  You may want to think about this before our next class.  If you want to feature something special in your center block, some embroidery, a fussy cut fabric, an applique...these are just some suggestions.  It's a great block to do this with, doesn't mean you have to, just an option.  Below is the block without any special maneuvering.


Wanted to give you some time to think about this before we meet again.

I also wanted to share that there are a couple quilt shows coming up locally that you might enjoy attending.

"SPRINGTIME IN THE PINES"
28th Annual 


May 5 & 6, 2012
Saturday 10-5 • Sunday 10-4
Admission $6 (children under 12 free)
Shuttle between buildings
FREE PARKING

Here is a link for more information:  http://www.pinetreequiltguild.com/

And...
APRIL 14 - 15, 2012 FQG QUILT SHOW:"THIRTY YEARS IN REVIEW" 

Dresden Forest” is FOG's 2012 opportunity quilt.  Tickets will be sold until 3pm on Sunday, April 15, at which time the winning ticket will be drawn. 

This show will be at the Gold Country Fair Grounds in Auburn, CA on 
April 14th and 15th

Quilts and wearables; vendors; country store; cafe; raffle baskets; door prizes. Alex Anderson is the featured guest on Saturday! Admission $7. Saturday 10-5, Sunday 10-4. 

This is a local show and is just so much fun, they will have over 300 quilts on display and lots of vendors.  We will be meeting on April 13th, so I will remind you then.  You won't want to miss it.

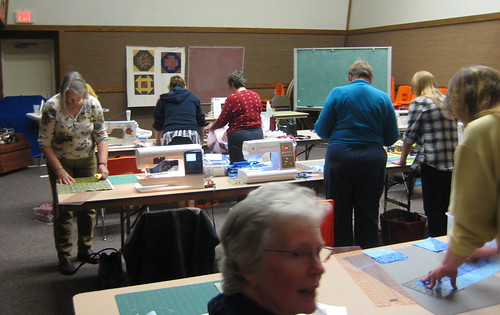
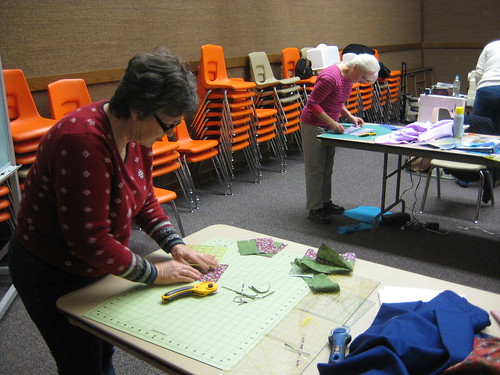
If you would like to stay after class and play with us, bring your sack lunch to class next time, we can place it in the fridge in the kitchen.  I have a couple quilt tops planned for the afternoon, I think we can get two done if enough folks want to stay.  One will be a "Twister" quilt and the other will be a "Lawn Chair" quilt.  Both are very quick and easy. You may want to learn how to make them and make one for yourself!  


We will be utilizing a "construction line" technique so we can get these done quickly.  A couple gals will cut the initial pieces, a couple gals will sew the initial pieces, then a couple gals will cut the segments and a couple gals will stitch them back together.  Ideally I would love to have 8 of you for the afternoon...if you can.  If you like the patterns as we make them, let me know and I will get you a copy of the directions.
 

The needs of others are ever present, and each of us can do something to help someone.

Thanks Ladies for being so willing to share your talents.
Enhanced by Zemanta

Friday, February 17, 2012

Newby Quilting Bee - Class 2 Follow Up


We have completed class 2!  Many of you have brought your blocks to class to share and I thought it would be fun to put them all together in a 4 x 5 layout to see what a "quilt" might look like.  I didn't spend time "placing" the blocks in any order, they are just in the mosaic as they came up in my photo sequence.  Still, I think it gives you a little flavor of what may be.  This was created using Big Huge Labs Mosaic Maker, which is free and you can make your own by going to this link:  http://bighugelabs.com/  They are lots of fun to make and great for family photos too!


So in our class this past week, we talked about color a little bit and handed out color wheels.  You can see from the mosaic above all the different approaches to color that people in the class used.  You can see how certain parts of the block will become more pronounced depending on placement of the colors in your design.
We used a piece of batting hung up in front of the classroom to "audition" the placement of our components to determine just how we wanted to lay the block out.  Below are some examples of one students variations.


All the same fabric, all the same components, each a different look for the block.  I encourage you to practice your blocks at home, try out different layouts, different color placements, experiment.  We are only making 9 blocks in the class, so you will have room, if you want a larger quilt, to include your variations...and we haven't talked about the back of your quilt yet, you can always include a block or more on the back, that will be another class.


Remember, all of this is new to you, don't get frustrated...take your time, measure everything twice before you cut, make careful cuts, square up your components and work on that 1/4" seam.  As you go along you will develop your skills and your blocks will look better and better!  We all take baby steps to begin with, just be patient with yourself and don't give up!  Persistence will pay off in a beautiful block!  Call or e-mail if you get stuck or need help with something.


I love this picture.  The gal in the middle is taking a moment to review her instructions!  Remember to breathe, sewing and quilting should be an enjoyable, creative experience.  If it gets too tense for you, take a break and come back to it after re-reading the instructions.  Think of quilting as a marathon, not a sprint, it's not how fast you do it, take your time.  


Welcome to Mavis, our newest class member, who recently moved here from Wisconsin!  I love the rose in the middle of her block, very pretty.

Okay, so to recap, we have created 3 blocks now, all from pretty much the same components.  We have learned to make a Half Square Triangle Unit and a Strip Set.  In our next class, we are going to use that Strip Set concept again to create the middle of our next block, which is called "Monkey Wrench".  It may look complex, but this is a really easy, fast and fun block.  Think about how you would like your colors...you can make this with 2 colors, 3 colors or 4 colors.  2 colors will use the least amount of fabric and will be the easiest to sew, 4 colors will be very exciting and a little more challenging!  You decide!


Wait till you show your friends this block! 
They are going to think you are amazing!


Our Next Newby Quilting Bee Class will be held on 
Friday, March 9th starting at 9am.  

Bring a sack lunch, stay and sew in the afternoon!  Extra fabric will be provided if you would like to practice a block and donate it for a charity quilt.  

Sunday, November 6, 2011

Newby Quilting Class Starting January 2012


Starting in January 2012, I will be teaching a class in beginning quilting at our church in Foresthill, CA.  We will start with the very basic Friendship Star Block and progress through the next 9 months learning new techniques and tackling more complex blocks.  In month 10 we will assemble and finish the quilt.  A tutorial will be posted here for each class with photographed step by step instructions for each block.  Included will be tips and techniques for accurate cutting, piecing and pressing.  If you cannot join us in person, I hope you will join us online and enjoy this class.  A Flickr site will be set up to post pictures of your blocks and finished quilts.

If you would like to practice your block each month and make one extra to send to us, we will put those together for charity quilts.  This is totally optional and not required.  Contact me if you would like to donate a block or a few, and I will provide you with a mailing address.

The finished quilt size will be 78" x 78", feel free to enlarge or reduce the patterns.

You will need some basic supplies to get started.  A sewing machine, thread, bobbin, rotary cutter, rotary cutting mat, 6" x 12" rotary cutting ruler, scissors, pins, a pencil or a "disappearing ink/mark-b-gone" pen.
Watch the sales, you can pick up a rotary mat, cutter and ruler in a kit for 1/2 off.  It will run you around $25.00.

Fabric:  Please use 100% cotton.  For the Friendship Star Block, you will need 2 fat quarters.  A fat quarter is 18" x 22".

Pattern and instructions will be posted January 1, 2012.