I hope everyone is having a wonderful Fourth of July! John is over in Meadow Vista today cooking at a church pancake breakfast for about 400. He loves to do it every year. It's put on by the folks in our old Ward in Colfax. We miss them a bunch and enjoyed their company last Sunday when we dropped in and attended meetings with them. Many sweet, beautiful and spiritual testimonies were borne that day and it was wonderful to share communion with all our friends.
It's important on this Fourth of July to remember the principles that this country was founded upon, the sacrifices that were made by so many for our freedoms. We must never take it for granted and must fight at every turn to uphold those principles. Our country came from humble beginnings and I was struck today by a photo of the desk upon which the Declaration of Independence was written!
Declaration of Independence Desk, 1776
This week’s Smithsonian Snapshot celebrates the July 4, 1776, U. S. independence from Great Britain.
In 1776, Thomas Jefferson wrote the Declaration of Independence on this portable desk. It features a hinged writing board and a locking drawer for papers, pens and inkwell.
On July 4, 1776, the Continental Congress amended and adopted the declaration. Its words not only established the guiding principles for the new nation, they have served to inspire future generations in America and around the world. This desk continued to be Jefferson's companion throughout his life as a revolutionary patriot, American diplomat and president of the United States. While the drafts of the Declaration of Independence were among the first documents Jefferson wrote on this desk, the note he attached under the writing board in 1825 was among the last: "Politics as well as Religion has its superstitions. These, gaining strength with time, may, one day, give imaginary value to this relic, for its great association with the birth of the Great Charter of our Independence."
On Nov. 14, 1825, Jefferson wrote to his recently married granddaughter Ellen Randolph Coolidge to inform her that he was sending his "writing box" as a present to her husband Joseph Coolidge. The desk remained in the Coolidge family until April 1880, when the family donated it to the U.S. government. It was transferred to the Smithsonian in 1921.
I think it's important today, in keeping with my love of fabric, to remember Betsy Ross, the woman who stitched the very first flag which represented our new nation!
Betsy would often tell her children, grandchildren, relatives, and friends of the fateful day when three members of a secret committee from the Continental Congress came to call upon her. Those representatives, George Washington, Robert Morris, and George Ross, asked her to sew the first flag. This meeting occurred in her home some time late in May 1776. George Washington was then the head of the Continental Army. Robert Morris, an owner of vast amounts of land, was perhaps the wealthiest citizen in the Colonies. Colonel George Ross was a respected Philadelphian and also the uncle of her late husband, John Ross.
Naturally, Betsy Ross already knew George Ross as she had married his nephew. Furthermore, Betsy was also acquainted with the great General Washington. Not only did they both worship at Christ Church in Philadelphia, but Betsy's pew was next to George and Martha Washington's pew. Her daughter recalled, "That she was previously well acquainted with Washington, and that he had often been in her house in friendly visits, as well as on business. That she had embroidered ruffles for his shirt bosoms and cuffs, and that it was partly owing to his friendship for her that she was chosen to make the flag."
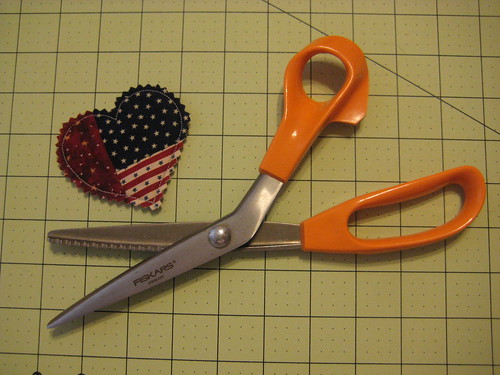
In June 1776, brave Betsy was a widow struggling to run her own upholstery business. Upholsterers in colonial America not only worked on furniture but did all manner of sewing work, which for some included making flags. According to Betsy, General Washington showed her a rough design of the flag that included a six-pointed star. Betsy, a standout with the scissors, demonstrated how to cut a 5 pointed star with a single snip. Impressed, the committee entrusted Betsy with making our first flag.
According to Betsy Ross's dates and sequence of events, in May the Congressional Committee called upon her at her shop. She finished the flag either in late May or early June 1776. In July, the Declaration of Independence was read aloud for the first time at Independence Hall. Amid celebration, bells throughout the city tolled, heralding the birth of a new nation.
Much suffering and loss of life would result, however, before the United States would completely sever ties with Britain. Betsy Ross herself lost two husbands to the Revolutionary War. During the conflict the British appropriated her house to lodge soldiers. Through it all she managed to run her own upholstery business (which she continued operating for several decades after the war) and after the soldiers left, she wove cloth pouches which were used to hold gunpowder for the Continentals.
On June 14, 1777, the Continental Congress, seeking to promote national pride and unity, adopted the national flag. "Resolved: that the flag of the United States be thirteen stripes, alternate red and white; that the union be thirteen stars, white in a blue field, representing a new constellation."
The video above, shows you how to cut a 5 pointed star with only one snip! Just like Betsy Ross did!
Hope these little bits of trivia were fun for you and that you have a Great Fourth with your family and friends! I'm off on vacation this week and planning to sew up a storm!
It's going to be a busy month! Our Newby Quilting Group will be sashing our blocks together on July 13th and there is much preparation for me before that meeting, I have two quilts going, want to have one completed for display and one to work on in class. Also want to have the Handi-Quilter rack up and loaded with a quilt so the gals can play with the free motion trolley system.
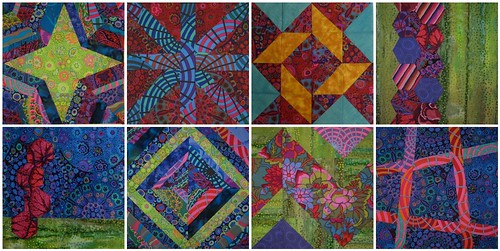
So, I am getting my Craftsy blocks done right away this month. The first one is a Dresden Block. I didn't do anything special with this. Used Kaffe Fassett fabrics for the entire block. Working on the Wheel Block next. I'll add the pics of that block to this once it's complete. Mean time...here's my Dresden
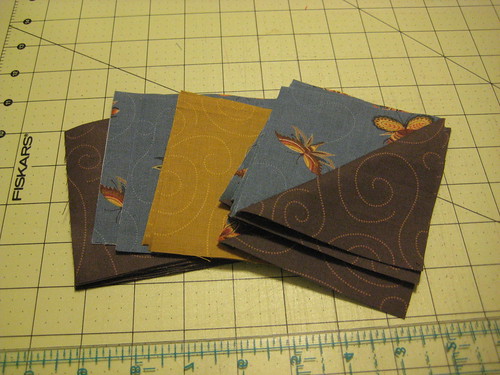
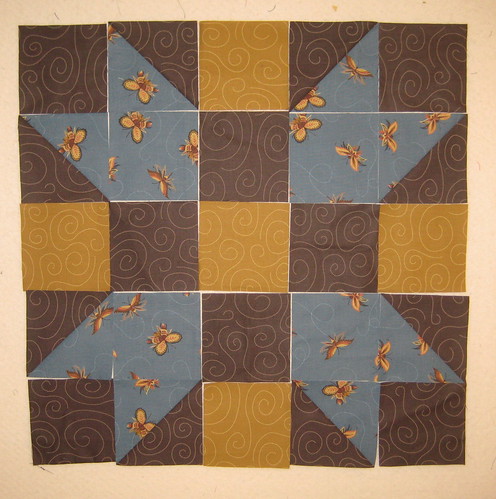
Just finished the Wheel Block. I like it! I made a four patch for the background and then alternated the same colors in the wheel to create a different effect.
Craftsy BOM July - Wheel Block
Okay! More quilting fun tonight, I got a nap this afternoon, I'm on vacation this week, I should get some sewing done!!!
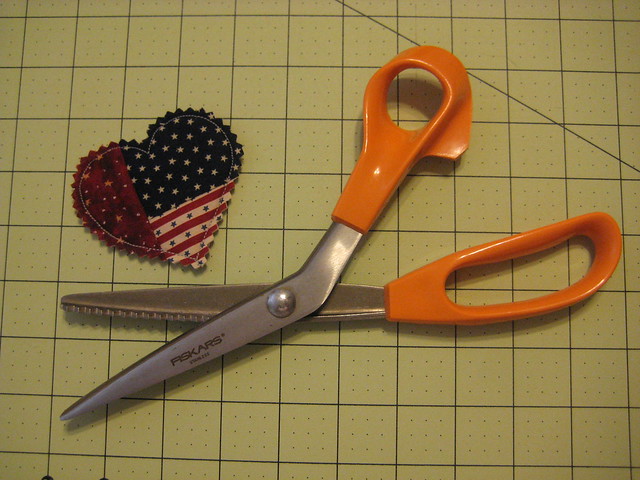
Flag Day, Fourth of July...Great time to make up some little Patriotic Heart Pins! You can make these hearts any time of year, in any fabric. They are delightful and you could embellish them with embroidery, buttons, what ever your heart desires!
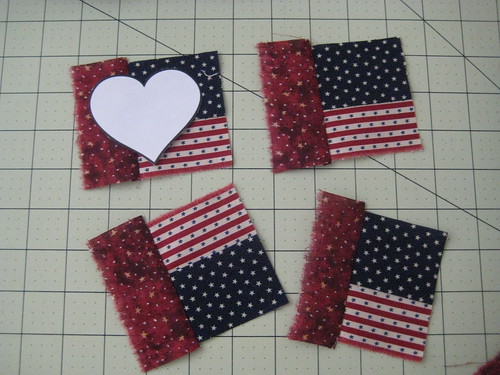
First you grab some scrap strips, the width is up to you. For these hearts I used, 2 strips about 2 inches each. I stitched them together and cut them into pieces that were 2 1/2 inches long, then I lined them up perpendicular to another 2 inch strip and stitched them together, cut them apart and you should have something that looks like this below:
I found a heart template online that was the size I wanted to use for my pins, printed it and cut it out. You can see the trial placement above.
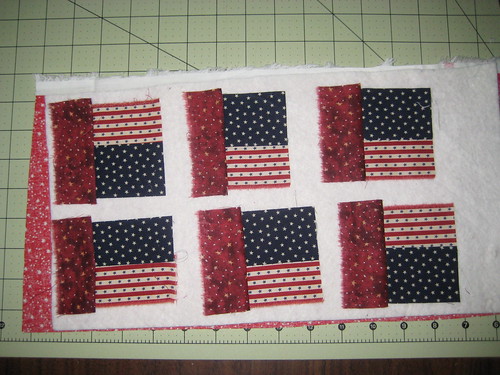
Next I lined them up on a piece of batting, cut a piece for the backing and gave them a light press.
Placing the heart on one of the squares, I used a quilt pounce with white chalk in it to obtain the outline. Repeating for all the squares.
Then I cut them apart with my rotary cutter, just to make them easier to stitch.
Stitch, following the outline of the chalk, back stitching at the bottom of the heart to secure the threads. (you can pull them through to the back if you have nothing to do and time on your hands, but if you are making a gazillion for your friends, then just back stitch a couple stitches to secure and clip your threads)
The beauty of this chalk is that, when you are done stitching you can press them with a steam iron and the chalk disappears! Here is a link if you don't have one...Full Line Stencils Quilt Marking Tools
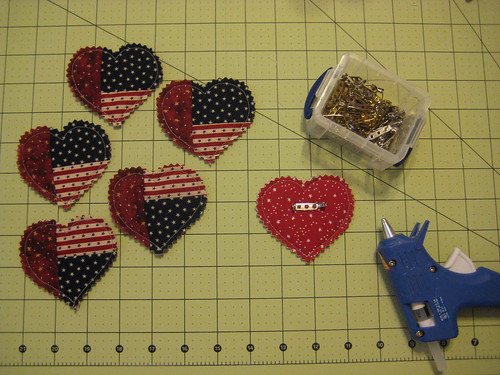
Take your pinking shears and carefully cut around the outside of your stitching line to finish your piece.
Heat up your glue gun and get some pin attachments from your craft store, a little hot glue to the pin, press in place and let it set up. Make sure you put enough glue on the pin to ooze through the holes as that will help to secure the pin.
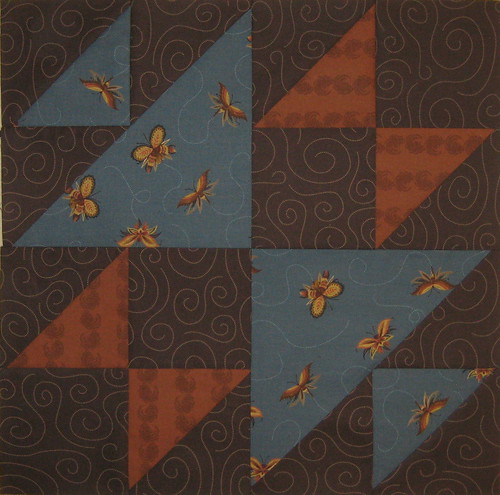
This Block has lots of possibilities! And believe it or not, it's relatively easy to make. Again we will practice chain stitching with this block.
From your packet of pre-cut fabric, you will need 4 of your 5" squares of your primary fabric and 4 of your 5" squares of your background fabric. Placing right sides together, draw a diagonal line on one of the fabrics from each set. Chain stitch a 1/4 inch seam down one side of the line, feeding your next set in without breaking your thread, continue till all four sets are stitched. Raise your presser foot without breaking the thread, pivot and sew another 1/4 inch seam down the other side of the line. Once you have completed all four of the sets, you will cut them apart and using your rotary cutter and a ruler, cut along the diagonal line that you drew between the stitches. Press the units open. You should have 8 half square components now.
Take these 8 half square components and square them up to 4 inches each. These components coupled with the remaining 4 inch squares will create your block!
(I have left the center block out, you will need to cut that in class (4 inches square) from your left over fabric, according to your desired layout, see below) Lay them out on your mat and when you have the design created in a pleasing manner, stitch one row at a time, paying careful attention to how things are laid out. Once you have all the rows stitched, press them in opposite directions, match your seams as we have with previous blocks and stitch those rows together, again paying careful attention to order.
Here we go! You have pre-cut your pieces as instructed and we are ready to sew this block together!
We are going to chain stitch today. This is a great technique and you can benefit by looking for opportunities to use this technique when you are making other quilts.
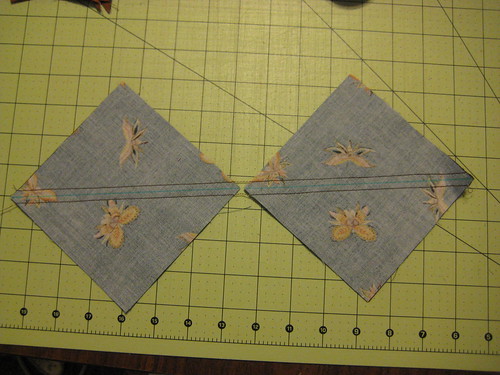
Take one 5" square of your primary fabric color and place it right sides together with a 5" square of your background fabric. Draw a line diagonally across your block on the wrong side of the fabric. Do this two times! Stitch a scant 1/4 inch from the line you drew, on both sides of that line. Do not break the thread as you stitch, just insert the next block and continue stitching...when you get to one end, lift your pressure foot, pivot and head back down the other side. You should have something that looks like below.
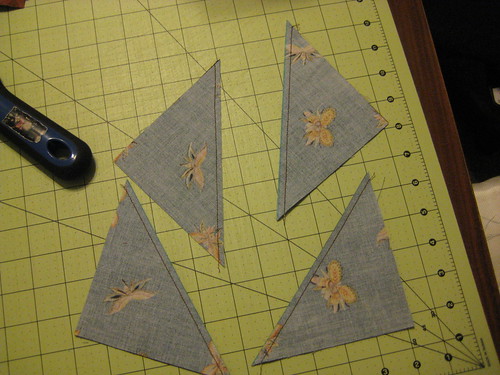
Cut these apart and then cut them using a rotary cutter and ruler on the line you drew, as shown below.
Press Open.
Look at the photos below first before you read the directions, they will make more sense.
Now, on ONE side of your half square triangle, I want you to stitch one 5" block...it's going to hang over, so line up your edge with the outside of your half square triangle. Make sure that your feature fabric is placed as shown below and your background fabric is to the outside. If you are sewing background fabric to background fabric, you have your placement incorrect, check it twice, sew it once!
When you have one "wing" on, then I would like you to line up another square on the other side and do the same as above, make sure to line up your block on the outside and overlap in the center! Your piece should look like this below. Press open. You have started component #1
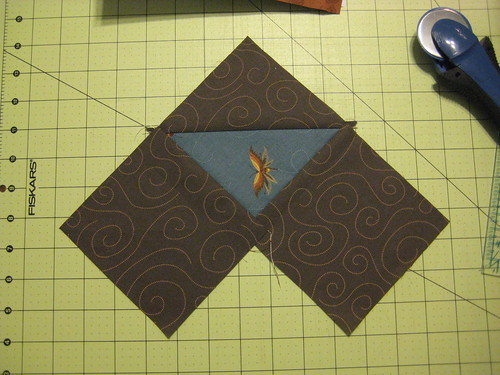
Reach into your pre-cut fabric packet and pull out your large square. Cut that in half on the diagonal and take one of those pieces and place it on top of component #1 as shown below.
Now line up your ruler on the diagonal and trim off the excess fabric, your piece should look like this below when you flip it over. We are going to place a few pins and sew carefully, not to stretch this seam as it is on the bias.
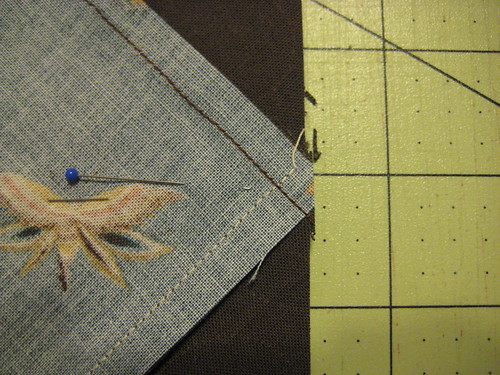
When you are pinning, I want you to place the pins away from the seam so you don't have to move them and you are not sewing over them. You will stitch a 1/4 inch seam on the long diagonal edge. When you get to the center, carefully stitch so that you are 1 thread width away from the intersection of the pieces as shown below. This is important and will result in a perfect piecing when you turn and press. I have used two color threads to highlight the intersection that you want to stitch right next to.
The example just below is what you are striving for.
When you turn and press this now, it should look like this...
Alright, you should make two of the completed components #1 and set them aside.
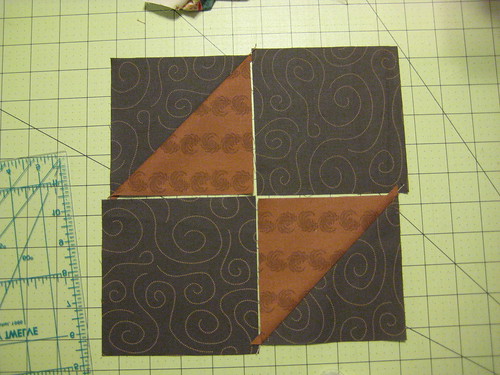
Component #2 is created by making 2 half square units and stitching them together with a solid square as shown below.
Your pre-cut squares will be larger than your half square units. Make sure you line up your pieces and sew them so that the extra fabric is on the outside of your unit and able to be trimmed off. Once your piece is sewn together it should look like this...
Trim off the excess to square up your block. Measure your component blocks and make sure they are all the same size. If not, trim them to square them up. Place your components on your mat so that they create the Old Maid's Puzzle and stitch your four components together. Stitching first the right pieces to the left and then the top to the bottom. Remember the trick of pressing your steams in opposite directions and squeezing them together so they will meet perfectly. Remember to place a pin next to the intersection rather than in it and you will have a better result.
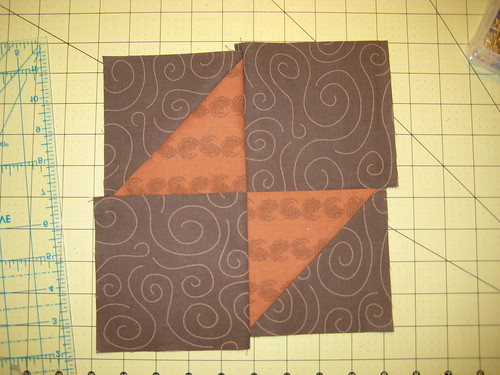
Your finished block should look like this...
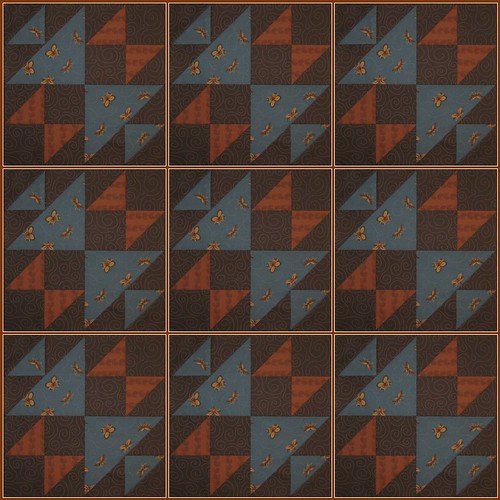
Here's and idea of what a quilt made entirely from this block might look like...
Our Next meeting will be held July 13th. at 9am. We will be squaring up our blocks and starting to sash them together! More information will be sent to you prior to the meeting, so make sure I have your e-mail address!!!
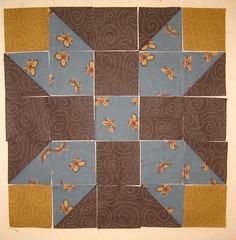
Two Blocks this week! Old Maid's Puzzle on the left and Sister's Choice on the right. Since we will be making two blocks in class, I would like you to come with your fabric already cut out and ready to sew. I am going to suggest that you cut a small snippet of fabric and paste or tape or staple or pin it to your instructions below, so that you don't get confused about what you are cutting out. Or use a color crayon to mark the color prominently next to the cutting instructions for that part of your block. And then check them off once you are done.
Here are your cutting instructions for the Old Maid's Puzzle Block:
2 strips of your background fabric (the white in the sample) to measure 5 inches by width of fabric 44". Cut these strips into 5 inch squares. You will need 15. (now don't freak out if you don't have 44" wide fabric, if you are using fat quarters for your background or scraps, just make sure you end up with 15 of your 5 inch squares.)
Of your secondary color (the gray in the sample) you will need 4 of your 5 inch squares.
Of your primary color (the purple in the sample) you will need 2 of your 5 inch squares.
Of your primary color (again the purple in the sample) you will need 1 square measuring 9 inches.
Please pin your squares together by size and color and label them with a small piece of paper. Enclose them in a zip lock bag and bring to class.
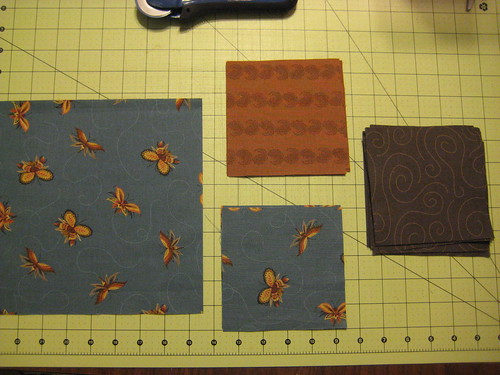
Here are your cutting instructions for the Sister's Choice Block:
From your background fabric (the white in the sample) you will need 8 pieces measuring 4 inches square and 8 pieces measuring 5 inches square.
From your secondary fabric (the gray in the sample) you will need 5 squares measuring 4 inches.
From your primary fabric (the blue in the sample) you will need 8 squares measuring 4 inches and 4 squares measuring 5 inches.
As with the block above, please pin your squares together by size and color and label them with a small piece of paper. Enclose them in a zip lock bag and bring to class.
In our class Friday we will be focusing on a technique called chain stitching. This is a great time saver when you are doing several pieces that are exactly the same. When you are piecing a quilt, you will want to look for opportunities to use this technique.
Looking forward to a great class with lots to share! See you Friday, June 8th! Directions for making the blocks will be posted on Friday afternoon after class.
Okay, I promised I would tell you how I make the meat sauce and since my son Andrew is arriving home from London tonight...and I am making another batch of malfatti for him along with the sauce...here you go...
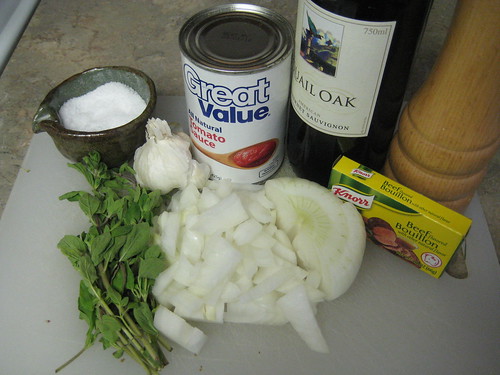
You will need the following:
you will need the following:
1 lb of sweet italian sausage
1 medium or 1/2 of one large yellow onion chopped.
1 or 2 cloves of garlic finely minced (only use one if you don't like garlic)
1/2 cup dry red or white wine...doesn't have to be expensive, I paid $1.99 for this bottle at Safeway.
1 15oz can of tomato sauce, again doesn't need to be expensive.
1 cube of beef bouillon
1 1/2 cups of hot water
salt and pepper to taste
2 tsp fresh minced oregano
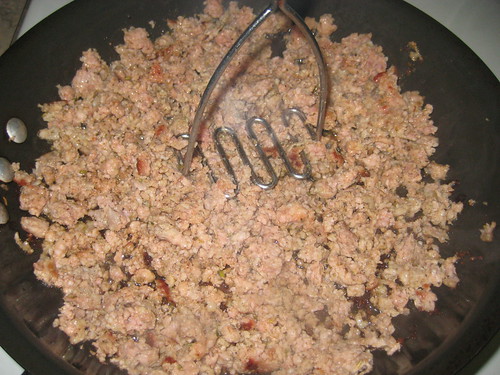
Step one is to brown your meat.
I use a potato masher to break up the meat into fine pieces, personally, I like the texture better in the sauce, it's more uniform and there is more flavor exposure.
once your meat is browned, add your onions and saute until they are translucent.
Mince your garlic and have your wet ingredients read to add all at once. Add your garlic and give it a stir, we don't want to brown the garlic (that would make the sauce bitter) As soon as you get the garlic stirred in, add your wet ingredients. Doesn't matter the order.
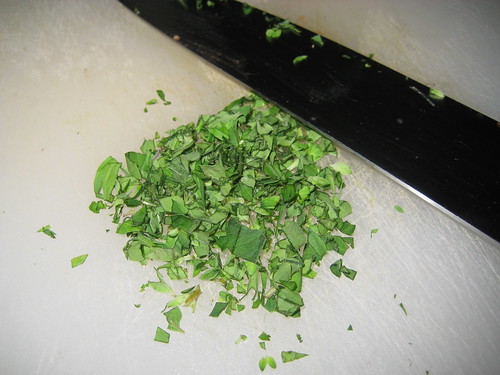
Mince your herbs and have them ready to add as soon as you get the liquid ingredients in.
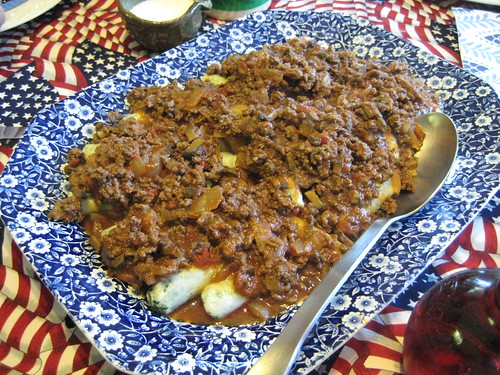
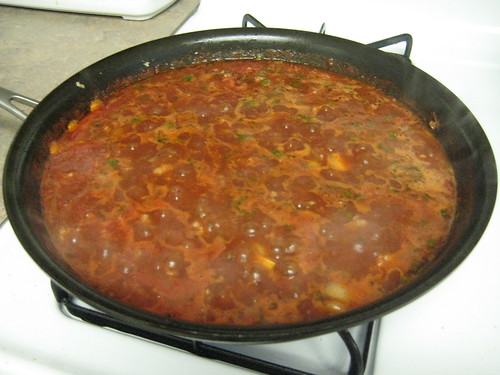
Your sauce should look like this...simmer it gently for about 15 minutes, it will thicken. Taste and adjust the salt and pepper to your liking. I find that with the bouillon and the sausage, it's not necessary to add any salt. But everyone's taste is different.
This sauce is delicious and you can serve it over any kind of pasta you wish! It would even make an amazing dip for focaccia or sour dough bread, garlic bread, vegetables...anything you can think of!
Enjoy!
The only e-mail I got from my son this week before he came home was "don't eat all the malfatti!". Gotta love that boy! We even saved him some mom's world famous applebetty with caramel sauce! ;-)
Years ago, I lived in Napa Valley. Yes it is every bit as beautiful as people tell you it is...although, for me, it's a bit congested these days. In the 70's we use to go to Lawler's Liquors across from the Butter Cream Bakery on Jefferson Street and in the back, you could purchase Malfatti with meat sauce and garlic bread...It was amazing! They are still there, the Malfatti are still incredible...but alas, it is just a bit too far for me to run for a dozen or so.
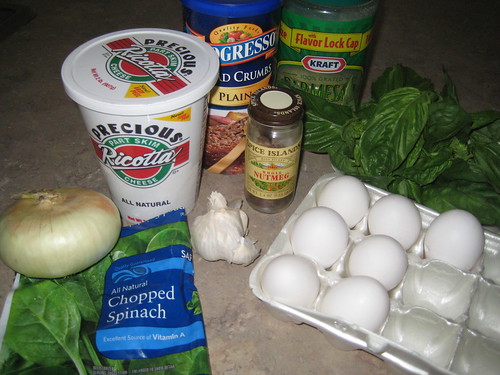
But never fear, we have the recipe! Oh yes, and it is every bit as delicious as I remember all those years. I will say that they are a labor of love, it's not something you are going to whip together in a moment and slap on your table. But they are worth the effort. Here we go... you will need the following ingredients:
I double the recipe, so you can cut this in half...but you're gonna wanna make a double batch!
2 cups cooked chopped spinach, cooled and strained (squeeze all the water out using a towel) 3 cups ricotta cheese 4 eggs beaten 1/2 cup minced onion 2 cloves garlic (I put the onion and garlic in the food processor and run till it's very fine, almost liquid) 2 cups dry bread crumbs 1/2 cup grated parmesan cheese 2 tsp basil finely chopped 1/2 tsp nutmeg, freshly grated
Some unbleached all purpose flour for rolling, about a cup or so.
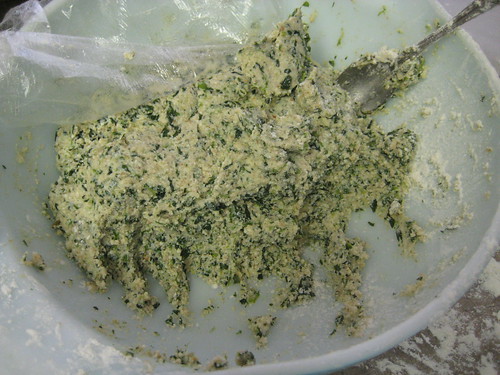
Mix all of the ingredients in a large bowl, just get your hands right in it and mix it up good. Cover it with Saran Wrap and put it in the fridge to chill about 1 hour. ( you can let it go longer, it won't hurt to make it up the day before...just fine) It should look like this when you take it out.
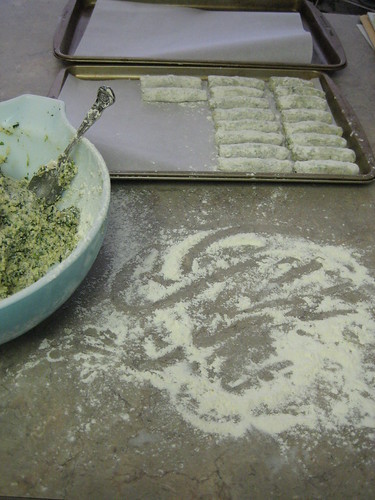
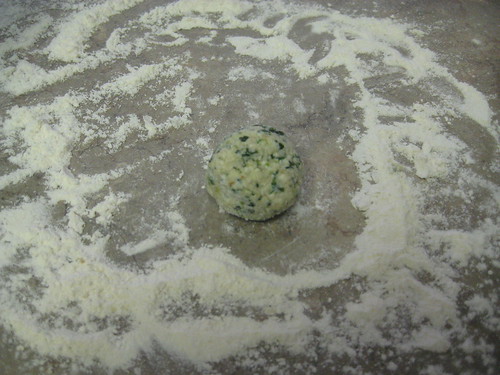
Liberally sprinkle flour on your board and take a teaspoon of the mix, rolling it into a ball (about the size of a walnut), set it in the flour and roll it into a finger shape (like those clay snakes you use to make in grade school!)
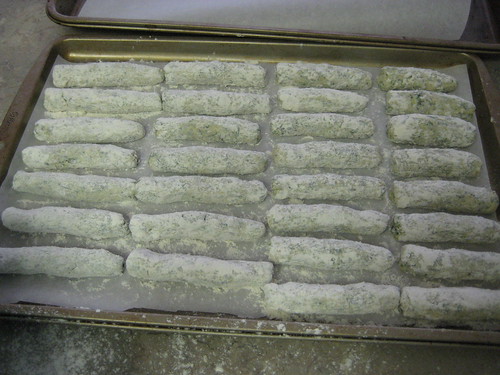
Now, I can see your face right now...don't worry about all the flour, your malfatti will absorb and incorporate what it wants and the rest will just come off in the water when they are cooked. It's a fresh pasta, you don't want it to stick to the little malfatti next to it, so I suggest you do as I do and put them on a piece of parchment paper lined jelly roll pan, or if you don't have that, liberally flour a tea towel and place them on that. You will want to transfer these to your fridge to chill for a couple hours, or freeze them for another day.
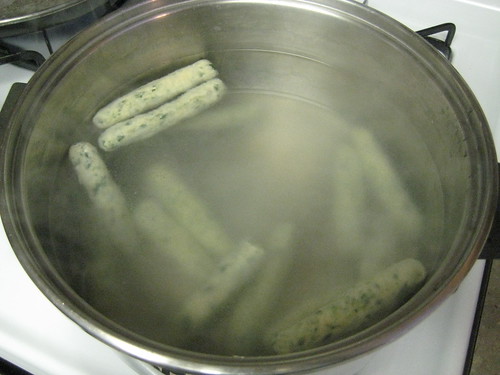
Malfatti in Italian translates to "Bad Made". They are rustic and delicious! There are a number of ways you can form them, some people just roll the tiny balls, some people roll a long log and then cut into pieces. I like this method because it's what I grew up with. It's a familiar taste in a familiar package. If I were going to describe how they taste, I would say, somewhat like an inside out cheese and spinach ravioli only so much better! I am cooking these for company tonight, so I will update this blog a bit later with some photos of the cooking process and serving. We will be having the malfatti with a meat and mushroom sauce, a tossed green garden salad with a strong wine vinegar dressing and for desert...my famous applebetty with caramel sauce!
As you cook the malfatti, they will rise to the top, takes about 3-5 minutes. When they are floating, lift them gently with a slotted spoon to your platter and cover with your sauce...enjoy!
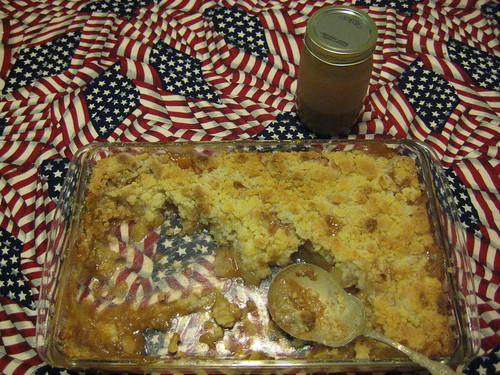
Our dear friends Bret and Brenda Allen came over to help us enjoy our malfatti Friday!
We put a serious dent in my world famous Applebetty with home made caramel sauce!
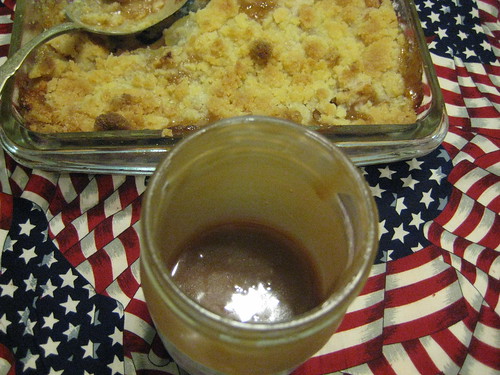
I put the caramel in the fridge after dinner was over and just got it out to get a spoonful to just enjoy...I LOVE caramel. There's not a lot left, we hit it pretty hard between the four of us! Hey, when something is that good, you just have to indulge yourself.