Monday, September 3, 2012

Quilting Tips


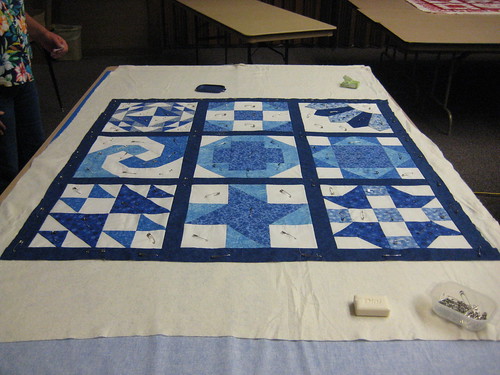
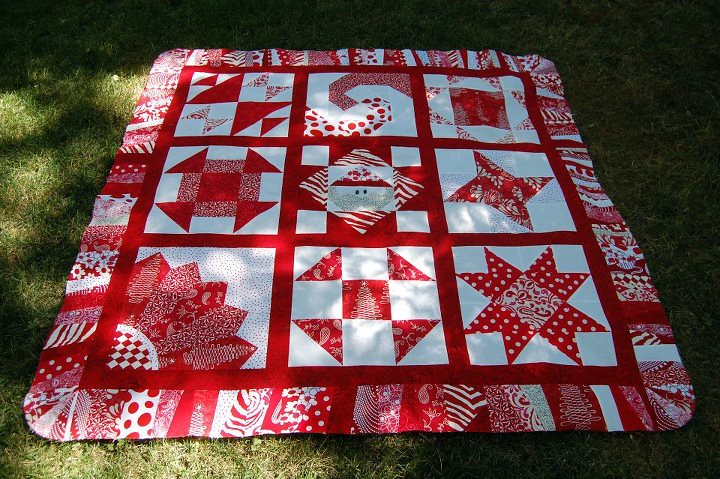
I have finished quilting my Newby Quilting Bee quilt and thought I might share some tips with you as you are starting to quilt your top.  
You will want to quilt your long sashing strips first, this anchors your quilt into nice little sections and makes it easier to get a cleanly finished quilt top.  I elected to do all of my stitching on this quilt in the "ditch" with the exception of the Dresden Fan Block, that block I echo quilted.  I also elected to utilize a clear thread for my top and a muted gray brown for my bobbin thread.  You can do what ever you wish.  There is no right or wrong way.

NOTE:  Before you start:  Make sure your machine is clean, well adjusted, you have the correct thread and sharp quilting needles.  Use a quilt sandwich made from the same materials you are using in your quilt to practice and adjust your stitches before you start quilting your actual quilt.  Good time to adjust your pressure foot also if you need to.

When you are stitching in the ditch, it's nice to have a clear thread so that your stitches do not show.  This method of quilting a quilt, let's your blocks do the talking.  Also, if you are making a quilting to toss over you, you will find that it gives you a softer finish for a more snuggly quilt.  The more you stitch your quilt, the less flexible it will become.  Lots of detail quilting is pretty for an art quilt that you will not actually lay under (a beautiful bedspread that you fold up at night rather than sleep under) or a wall hanging, or a table runner.  Check your quilt batting to see how close you need to stitch to secure the batting and keep it from shifting as you use your quilt.  This is important.  It's not fun to go to all the work to make a beautiful quilt top and then to wash it a few times and notice that all the batting has shifted and you have a lumpy quilt.  All that can be avoided.


Okay, so here is a picture of stitching in the ditch...you will notice that my needle is right in the seam or "ditch".  I use my longest straight stitch and practice on a quilt sandwich before starting out, making any necessary adjustments to tension that may be necessary.  It's good to get all those things sorted out on your practice piece rather than on your actual quilt.  


NOTE:  Take one stitch and bring your bobbin thread to the top as shown above!  Always do this.  You don't want a mess on the back of your quilt to try to sort out later.  This easy step will help you to have a secure and beautifully finished top.  


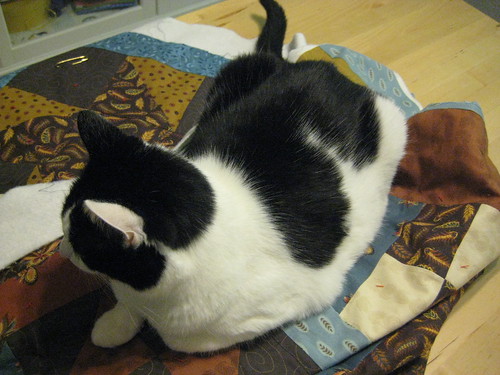
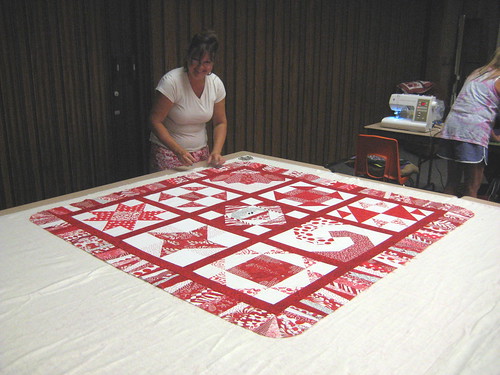
You will find, as you are working on your quilt, that it will help you to roll up the portion of the quilt that is passing through the neck of your machine as shown above.  It's very important as you quilt that you not have anything dragging on your quilt top.  Sometimes I toss the quilt over my shoulder to support it.  Make sure that it moves easily and that you have sufficient table space surrounding your quilt that it is NOT hanging off the table.  You want fluid motion, not drag.  If you are working on a very large quilt, or have thick batting, you may want to get a couple bicycle clips to hold your rolled quilt in place, back away from your work area.

Once you have quilted all of your sashing, starting with the long strips and then the short strips and the outside, you can then quilt each of your blocks without worrying that things will shift horribly. If you are quilting a large quilt without sashing, just do the same thing, divide it up into sections and get those sections secured, then quilt off those sections.

What do you do with all those threads on the top of the quilt now.  Well, don't just cut them off...as you wash your quilt, your quilting will come undone.  We don't want that.  Take a moment and tie each of the threads into a knot, thread them through a sharp hand needle with a large eye and insert the needle right where your knot is, weave your needle through the batting and out about an inch or two and pull it back up on top, give a gentle tug and your knot will slip into the inside of your quilt and be buried in the batting.  Carefully clip your thread at this point.  See the pictures below. 
Tie a knot close to your top, do not clip threads!
Thread a sharp hand needle with the remain threads.
Take the needed and insert it right where the threads came up and weave it into your batting, do not go all the way through to your backing.  You want to weave out for about an inch or so and then pull the needle and threads up to the top of your quilt again.
Now give a little tug and your knot will bury it self into your batting.

CAREFULLY clip your thread, it will draw back into the batting and should be invisible now.


The next thing we need to do, it prepare our quilt top for binding.  You do this by squaring up your corners using a square ruler and trimming off the side bits that extend out from your top.  (remember, we gave ourselves plenty to work with.)  Use your ruler to measure your side carefully as your are cutting with your rotary cutter and mat. 
Use a square up ruler to square all four corners before you trim off the sides.

Okay, you have this beautiful trimmed quilt, ready for binding and a nice little stack of scrappy stuff left over.  DON'T TOSS THAT OUT!  I will show you what to do with that in a bit.  Don't waste!  Fabric is expensive and you already have the makings of something fun here.  

Before I close...this is by NO means a tutorial on quilting.  Just some quick pointers that work for me.  There are tons and tons and tons of books and websites that offer advanced tutorials and instruction on quilting.  It's an art, it takes practice.  Don't be impatient with yourself, practice does make perfect.  And remember, we have seam rippers, nothing is beyond repair.  Quilting can be and enormous frustration or it can be an exercise in meditation...it's your choice!  Put some beautiful music on that you enjoy and get into the groove!


One last picture...this is the backside of my quilt!  I didn't want to go into town to get backing fabric, nor did I want to spend the money.  The strips are left over from cutting the top and a couple extra blocks, cobble them together and you have the back.  Your back may be one solid fabric, or you make choose to do something fun on the back.  It's always your choice!  

We will be meeting this week on Thursday and Friday September 6th and 7th from 9am to noon to help you get your tops quilted and ready for the final step of binding!  Then the following week, on Friday September 14th from 9am to noon, we will tackle binding and inserting sleeves if you wish to display your quilt.  You are almost finished!!!


The Seventh Annual Colfax Outdoor Quilt Show will be held on Saturday October 6, 2012 from 10am -4pm in the little town of Colfax, CA.  Entries must be submitted by September 21st to be considered for the show.  Your quilt must have a 4" rod pocket and there is a $5.00 entry fee.  I hope you gals will consider entering your quilts in the show.  It's lots of fun to see your quilt on display and to hear the lovely comments from folks as they walk by.  If you are interested,  I will have entry forms at the meeting Thursday and Friday or you can contact me and I will get one to you!

Here is a link for the Whistle Stop Quilt and Sew Shop:  http://www.zoomaru.net/index.php?id=0&display=portal&eportal=whistlestop

They have a great calender of events coming up and some really lovely fabrics in their shop.  If you have been wondering about machine maintenance, they have a special class you can take. Suzanne Maguire and her husband Larry have just celebrated their 5th year in business at that location.  Please support them when you are in Colfax.  

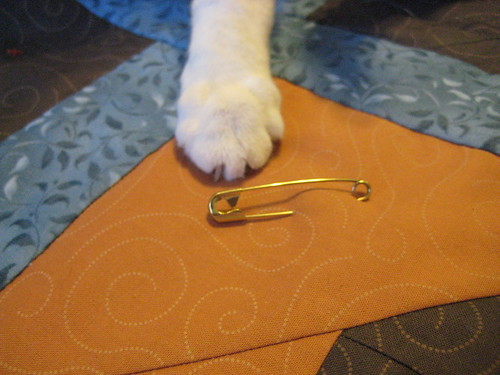
Remember these?  Well read below to see what you might do with your trimmings!


Here is what I did with the left over scraps from trimming the batting and backing from my quilt.  I cut all the pieces 12.5 inches long.  Took a piece of fabric from my stash for the back and laid the strips and the batting down until I covered what I wanted.  Then I flipped only the fabric strip over and stitched them right sides together all the way through to the backing. Your bits of batting will be secured with the stitching, you can just butt them right up to each other and pin them in place until you get them stitched.   When it's all covered the size that you want, trim it up and bind it.  You can make a fun table runner or book cover this way...or even a piece of fabric that you could use to make into a tote!  The possibilities are endless.  Just have fun!  


Trimmed into 12.5 inch strips

lay them out in a pleasing manner.

Stitch them to a piece of backing fabric, bind them and you will have some fun snack mats.


Saturday, September 1, 2012

Sophie - The Wonder Cat - Quilts With Me.


I thought yesterday would be a good day to get started quilting the Newby Quilting Bee quilt.  You can see by the look on Sophie's face that she recognizes that she has work to do and she is quite ready to help!  

Yes, she is in position, holding the work in place, making sure it doesn't fly off the table as I quilt.  
She has carefully pointed out an area that needs quilting.  Very gently so she won't hurt my feelings.
She is a scrutinizer and a tough one sometimes.  If she doesn't like what you are doing she can be immovable from her position.
Always an eye toward detail!  Nothing escapes her purrview. 
Those feet look so dainty curled under, don't let her fool you!  She has some mean meat hooks that she loves to use on her daddy. (he plays rough, so he deserves a hook now and then)
She is telling me that I need to get back to work now, so I better step to it!  We are three quarters of the way through it now and it's looking lovely!  Thanks Sophie for your unwavering help, I could never do this without you!


Friday, August 10, 2012

Newby Quilting Bee - Pinning the Quilt Sandwich

Teri Williams Quilt

We got together this morning for our monthly meeting of the Newby Quilting Bee.  Today we learned how to make the quilt sandwich and pin our quilts.

So to begin, you need to measure your quilt top.  Then you need to have enough batting and backing to go 3-4 inches beyond your top. If you are going to be having your quilt, quilted by a longarm quilter, they will instruct you how much additional fabric and batting you need beyond your quilt top for their purposes.  So, check with them first!  If you are quilting for yourself, on your table top machine, then this will be sufficient for our purposes.

Make sure you have pressed your top and your backing so that they are wrinkle free.  We pushed two or three tables together to avoid having to get down on the floor and pin our quilts.  You may want to do this at home as well.  Folding tables work fine, you don't have to worry about the pins scratching your good dining table.  If all else fails, you can use the floor, you have more stamina than me...LOL.
Brenda Allen's Quilt

First, lay your backing fabric down with the wrong side facing up.  Take your masking tape and tape the edges of your backing to the table so that it is snug and wrinkle free.  Don't stretch it, just smooth and wrinkle free.

Next, lay your batting on top of your backing fabric and start to smooth it from the center out to the edges.  Depending on the type of batting you are using, you may or may not have to tape it as well.  Some of the high loft battings will do better if you tape them.  If you are using a "Warm and Natural" brand you can just smooth it and it will be fine without taping.  Now don't freak out if you bought a huge piece of batting and it is way beyond your quilt, you will trim it in a bit, but not yet.

Now, lay your quilt top on the smoothed batting.  Again, starting from the middle of your quilt top, smooth your top from the center to the edges.  When you have completed this process you are ready to pin your quilt.

SIDE NOTE #1:  See Brenda's cute border on her quilt above?  Well, she was worried about the strips coming apart as she worked on the quilt top.  The easy solution is to topstitch 1/4 inch from the edge all the way around and that will stabilize those edges.

When you purchased your batting, it would say on the package or the bolt end, how close you need to quilt.  When you are pinning, think about what kind of quilting you may be doing.  Stitch in the ditch?  Stitch next to the ditch?  Echo quilting?  Lay your pins out so that you are not having to stop every five seconds and remove and replace pins as you quilt.  Using your safety pins, pin through all layers.  I like to pin about every 6 inches or so.  You want it to be secure so that as you are wrestling it around and quilting, you will not have things slipping.  


Teri's Pinned Quilt
Sometimes, if you are having difficulty getting your pins through easily, remember the trick your mother taught you when you were diapering your babies.  Have a little bar of soap handy and run you pin across it and see how easily it glides through your quilt sandwich.


Janeal, Brenda and Shirley engrossed in their decisions.

Once you have finished pinning your quilt completely, you can trim around the quilt top, 3-4 inches out from the top.  You should have a margin of batting and backing sticking out beyond your quilt top by 3-4 inches.


Ramona Smith's Quilt
Now that you are finished pinning and have trimmed your batting and backing, you can roll your quilt up from one end to the other.  Do not fold it, we don't want wrinkles and folds to have to quilt around, rolling it will keep it in a good state for when we start to quilt our tops!


Shirley Statham's Quilt

Shirley Statham had a good friend who is a quilter and helped her  to deal with odd sized blocks, she simply bordered around each one with a thin strip and then cut them all to the same size and continued on, it's beautiful!  Shirley has been going to town on her quilts and has finished 3 already!

We will meet again on August 24th to start quilting!  Bring your quilt sandwich, your sewing machines, fresh needles, your quilting thread and plenty of bobbins wound with your backing thread color, scissors and a container to place your pins in as you remove them.  You will not need your cutting mats or rotary cutters for this meeting.

Let's talk about thread.  If you are stitching in the ditch and do not want your thread to show, I would suggest you get a clear poly quilting thread.  Here is a link for Superior Brand.  You can find this at most fabric stores and it's available online as well. http://www.superiorthreads.com/product/Brand/monopoly/
Here is another link which offers several brands.  http://www.redrockthreads.com/misc-thread/invisible-thread.asp
And a link for Aurifil.  http://www.aurifil.com/Aurifil/Invisible_thread.html
Get a poly rather than a nylon thread.

You will only use this thread in your top, you will use regular thread in your bobbin.  I can't stress enough that you load several bobbins, nothing is more annoying that having to take everything apart to wind a bobbin, just when you are getting in the groove.  

It was a blast today, seeing everyone's quilts and I am so excited for our next meeting.  Oh!  One more thing.  Please bring a little sandwich to practice on before we turn you loose on your quilt.  A piece of fabric about 12 x 12 inches with batting and backing as well, will be fine, use an extra block or bits of fabric that you have sewn together so we can practice the stitch in the ditch and others.  


Saturday, August 4, 2012

Swooning on a Saturday


We were going to go over to see our Granddaughter for her 1st birthday today, but Grandpa is not feeling well and doesn't feel up to the long drive over and back, it would be 7 hours in the car round trip.  I understand, but am disappointed not to be able to share in her day.  He has been having a difficult time lately so I have to respect that.


So, I was up early this morning, hoping to get in some sewing before we were going to leave at 7am.  The power was out yesterday afternoon and I was unable to get any sewing done, not to mention the unbearable heat.  It was over a hundred outside.  Not a good thing to have the power go out in the afternoon.  Anyway, we made the best of it, enjoyed an early dinner of skillet fried chicken and a big green salad.  Spent the time catching up on some magazines and had a generally peaceful afternoon.  Power came back on about 8:30 so we got in a little tv time and then off to bed.


I modified this Swoon block a bit by inserting bits on each of the center sides.  I like that way it looks, we will have to see how it works into the entire quilt.  Thought I would mock up a finished top and see where I am going with the last two blocks that I have yet to complete.

The brightness of each block is different in the photos but in true light, they are all the same intensity.  It will be interesting to see how it looks when it's completed.  Well, off to pour through the fabric and see what I want for the final two blocks.

Friday, August 3, 2012

Brenda and Janeal's Quilt Tops - Newby Quilting Bee


Brenda has now added her wonkie border with curved corners to her quilt top and is anxious to move on to the quilting portion of the event!  We are having a ball!  This is just so pretty and crisp with the red and white.


This sweet top is made by Janeal, a first time quilter in the class.  She even created a little light house scene for her center block, very clever since their last name is Light!  Great color selections for a first time quilter, lovely contrast.  I'm sure this will be something for her too look at with pride in her accomplishment!

We will have five or six more quilt tops that I know of that gals are finishing up...check back, more pictures to come!  Those that may be following along online, if you would like to send a photo of your top when you get the sashing on, we would love to share it!

We will have a catch up day this month, for those that are at the point that their top is finished and they are ready to start assemblying their quilt top, batting and backing, bring that and we will work on that together.

You will need the following materials for your top to get it ready to quilt:

If you will be quilting your quilt on your home sewing machine:

A box or two of 2 inch safety pins.  You want to be able to pin your top every 4-6 inches.

A roll of Masking Tape.  Make sure it is a fresh roll so that you have good stickum on it!  We will be using this to tape your quilt backing to the table and your batting to that before we place your top for pinning.

Batting to stick out about 3-4 inches beyond your quilt top.  Measure your quilt top and add 6-8 inches in each direction.  I like Warm and Natural...just my choice.  Go to Beverly's or Joann's and see all the different types, make a note of what I suggested and compare them.  You can buy it on the roll or in a bag.  You can also order it online on their sites.  Make sure you use one of their coupons to get 40-50% off!  And if you don't have one, if you have the American Quilters Society card (you can get that online here: https://www.americanquilter.com/quilt_world/user_signup.php) they will give you 10% off, if you are older, they will give you a 10% senior discount, just ask for it, I do!  

Backing, you will need a piece of backing fabric, again 3-4 inches wider all around than your top.  Measure your top, add 6-8 inches each direction.  You CAN piece your back, it doesn't have to be all one fabric.  You can insert an extra block, strips of various fabrics, be creative.  

Okay, so you will need, pins, tape, batting, backing and your top.

I think we are all set!


Wednesday, August 1, 2012

Sandy's Quilt Top!


One of my students in the Newby Quilting Bee Class, Sandy,  sent this along tonight.   I think it is coming along very nicely.  It's going to be so much fun to see everyone's quilts all finished up.  We are getting close now!  


Thanks for sharing Sandy!

Sunday, July 29, 2012

Make a Mix Oatmeal Raisin Cookies, A Reflection on the Past


Ice Box Cookies, they harken back to when I was a little girl.  My mother would mix up cookies and store them in the freezer, neatly rolled up and we would slice and bake them.  When my son was little, as a new mother, I of course wanted to replicate those warm feelings that I had as a child with my son. 


I forget how I was introduced to the Make-A Mix Cook Book Series and I had forgotten how fun their recipes were.  Last week I got the book down off the shelf and made up the Sugar cookies, today I made up the Oatmeal Raisin cookies.  There is something inside me that feels smug and wonderful, just knowing I have dozens of cookies at my disposal in the freezer.  It's soothing somehow.  I know that may sound funny, but I am from a generation that absolutely cannot have dinner without a little desert!


So for those of you who, don't have this book, here is the recipe with a few modifications by me (butter instead of shortening and spices where there were none)


1 1/2 cups butter
1 1/2 cups sugar
1 1/2 cups brown sugar
3 eggs
2 teaspoons of vanilla ( we make our own!)
Cream the butter and the sugar, then add eggs one at a time along with vanilla, cream well.
Sift together 1 3/4 cup flour
1 1/2 tsp salt
1 1/2 tsp baking soda
1 1/2 tsp cinnamon
1/4 tsp allspice
Add to creamed mixture and mix completely. Then add:
4 1/2 cups rolled oats
1 cup of raisins
nuts if you wish.
Divide dough into 4 portions, Shape into logs on wax paper or freezer paper, roll up, label and freeze.
To bake, slice a 1 inch piece of dough, then cut it into four pieces. (make as many or as few as you like) Place on a parchment lined cookie sheet and bake at 350 F for about 10 minutes, cool on rack and enjoy.


Mine are in the freezer right now and will be ready when my son arrives for dinner this evening!  Won't he be surprised!


Swooning on a Sunday


We are waiting for my son to arrive to spend the day with us.  He lives up the hill in Squaw Valley.  We are planning a family Sunday Bar-B-Que together.  I will enjoy his visit.  While waiting for him to arrive, I finished sewing Block #6 for my Swoon Quilt.  I spent the better part of yesterday fussy cutting the fabric for this.  Each block in the quilt will be different and I am playing with placement now, trying to decide what will go where and where the color focus should be for the remaining blocks.


There are many elements in this block that I love...What delights me most about this particular block are the "torches" in the 4 corners.  When you are back from the quilt, they really stand out.  


The Swoon Quilt Block is very easy and completely suitable for a beginner.  I have just taken it to a different level with the Stack center and the fussy cutting.  You do not have to do that.  Here is a link for the pattern:  http://thimbleblossoms.bigcartel.com/product/swoon-pattern-142-pdf-pattern


You can see from the pattern that it can be a very modern, stylish and simple quilt, beautiful in it's simplicity.  To see some other examples of how folks have completed this pattern you can look on Flickr at The swooning on a hop along group, here is a link:

Now, I am going to look at cutting out the next block while we are waiting for Andrew!  Who knows, I might just get another one done today!

Saturday, July 28, 2012

Quick Fun Strip Block


There was a cute little video on this block done by the Missouri Quilt Company.  They have so many great little video tutorials.  I am just replicating the block for my class here.  Enjoy, they are quick and fun!


First cut strips 2 1/2 inches wide, or purchase a precut "jelly roll".  


Now select 4 strips and sew them together in a strip set and press.


Measure the width of your strip set and cut blocks the same length. You are making squares with equal sides.  


Take two of your squares and lay one on top of the other right sides together with the stips going in opposite directions as shown below:


I like to place a pin in each corner, in far enough so that it won't impede my stitching.  You don't have to pin, but I think it helps to keep the corners straight and accurate for a nice final result.


Now stitch a 1/4 inch seam around the entire square, all sides, sewing the top block to the bottom block.  Hard to see in my photo as I am using white thread.


Now take your ruler and your rotary cutter and make your first cut on the diagonal as shown.  Do not pull your pieces apart, leave them.


Now cut across the diagonal in the opposite direction and then press open your bits!


You have four completed block that you can put together any way you want.  


Okay, show me your blocks!!!