Saturday, November 24, 2012

Christmas Pockets!


Making these little Christmas Pockets this weekend.  Pattern is by Valori Wells Designs, here is a link in case you want to make your own:  http://www.stitchinpost.com/patterns_sc.html


They go together very fast.  As you can see, I am just using scraps of Christmas Fabric.  And fussy cutting the inside piece so that it has a "pop-up" or "peek-a-boo" effect.  It's great to make with a border print for the pockets.  

Enclose a sweet note, some dollar bills and a gift card for your favorite store.  Great last minute gift or stocking stuffer and doubles as a great little wallet after ward.  Make from pretty fabrics for a birthday or other holiday gift.

Swooning on a Saturday, The Final Block!


Finally, I have finished the last block for my quilt top.  Yes, this is a Swoon block, doesn't look like it does it?   I have taken some license with the block and inserted strips.  The color placement changes the shape and design of the block.  


Using the Big Huge Labs Mosaic Maker, I have this as my potential layout for the finished top.  I think I like it.  The colors are very different in person of course.  Each of the photos were taken in different light at different times as the blocks were completed, so some look brighter than others.  They are all the same in intensity and hues.  It's fun to experiment with the blocks.  Each one is made from the identical pieces, it's just the fabric placement that changes it up.  There are strips added to two of the blocks.  

I have enjoyed this pattern.  Here is a link in case you want to make your own.  You can see from the pattern cover, it looks completely different made up in light fabrics on a white background.  Lots of possibilities and lots of fun!


Saturday, November 3, 2012

Fall Festival


It was a lovely evening of food and fun and visiting with friends and neighbors!  Costumed children ran the halls and enjoyed the trunk-r-treat out in the parking lot below the church.  Hot Dogs and Chili were the fare with plenty great sides to go with.  Some of the completed quilts were on display and enjoyed by all!  So many nice compliments on all the hard work our Newby Quilting Bee Group did.  The gals in the group surprised me with a beautiful card containing a very generous gift certificate to the fabric shop in Colfax!  Oh My Gosh!  Thanks ladies!  I was truly surprised and delighted!!!


I am almost completely recovered from my fall, I'm amazed how long it takes to get your knee working again once you fall on it like I did.  Anyway, moving around again, which is a good thing!  Catching up on some of my projects.  

Yesterday I finished the sashing on my Craftsy BOM...It looks amazing!  Yes, that BRIGHT blue color is the sashing.  This morning, I took my gift certificate to Colfax and shopped for some backing fabric for it.  I found the most lusciously divine deep royal plum.  I wanted to keep the backing simple, but still have it be a bold color statement like the front of the quilt, nothing subtle about this one.  So that will be one of my goals for this week, to get the batting and backing pinned in place and ready to sew.  Binding will probably be pieced bits of the fabric used in the top.


When I got home today I started back on the remaining blocks for my Swoon quilt, which you will remember I started a while back.  I modified the pattern a bit for this block and I'm happy with it, I like the little "butterflies" that turned up in the points.  Kind of fun.


Only one more block to go and then I can sash this one together also.  This will have black sashing, so it won't be a difficult process, just need to cut the fabric and sew it up.  Then I will have to go looking for some backing fabric and decide what I want for binding.

I see a great deal of machine quilting in my near future!  John's quilt must be finished by Christmas, so that will be the next push.  It's a simple 9 patch made with 6 inch squares, then cut in half both directions.  Blocks flipped and here's what you end up with...


Looks pretty subdued after the other quilts right?  Well it's for my husband to cuddle under and he didn't want anything too fancy schmancy. 

Speaking of John, he recently got me a "solar" dryer, in an endeavor to save some money.  So of course I needed a little clothes pin apron.  I found this pattern online at Mother Earth News.  Very easy to make, went together in about 1/2 hour and very practical!  http://www.motherearthnews.com/Do-It-Yourself/1979-03-01/A-European-Style-Clothespin-Apron.aspx


The fabric is Michael Miller's China Doll.  I just love it!  Makes doing the laundry fun!!!  And it makes me think of my Gram.

And last but not least...this sweet little girl at church, Sera.  I just love her.  She and her gramma always sit near us and she is just a girly girl.  She ran up to me and gave me a big hug and wrote me a sweet little note in church about how much she had missed me. (she is 6)  Oh, you know me, I melted.  (John was almost in tears)  So I made this little purse for her.  I kind of adapted an idea that I saw online at Stitchery Dickory Dock.  Ruffled Mini Wallet


She loved it and I'm so happy!  Her little face just lit up!  Sometimes, it's the little things that just make your day.  This was one of them for me.

That about catches you up with my week!


Sunday, October 21, 2012

Our Final Meeting of The Newby Quilting Bee Group


Sadly, all good things come to an end.  We had our last meeting for this year of the Newby Quilting Bee Group.  Diplomas were handed out, we enjoy a lovely pot luck brunch.  From left to right, Brenda, Sandy, Shirley, Teri, Ramona and Brandy. 

 Brenda brought down her lovely glass plates and some cloth napkins for us to dine in style!
 Each of the gals was given a little pin cushion and a kit to make a pumpkin like the ones below.  Everything in it but the batting!
 Teri, Brenda and Ramona have finished their quilts, they are just absolutely lovely!  I'm very proud of their accomplishments.  Valerie and Janeal were unable to attend, they have finished up their quilts and will have them for display at our Harvest Festival this Saturday.  Sandy and Brandy are finishing up their quilts, which will be stunning with the beautiful fabrics and colors they have selected.  Shirley has a beautiful quilt that she is having quilted, we are keeping our fingers crossed that it will be finished in time.  

Brandy with her beautiful quilt!

Shirley with her cute Pony Quilt!

Everyone of the gals in the class this year made such amazing progress.  I am so very proud of each and every one of them.  This was a big undertaking for first time quilters.  I so enjoyed the company of the gals and getting to know each of them.  The basic skills are there now and the sky is the limit!

We are looking forward to January when we will pick up the class again.  Our first class next year will be a simple paper piecing project for you to enjoy!

Fall Harvest Festival is this coming Saturday, October 27th from 5pm until 8pm at the LDS Church on Todd Valley Road.  There will be Games and Activities for the children from 5pm until 6pm.  Dinner will be served from 6pm until 7pm.  Trunk-or-Treat will be from 7pm until 8pm.  Trunk-or-Treat will be held in the lower parking lot this year to keep the upper lot clear for people to park without worrying about children darting around in the dark.  Costumes may be worn but we would request that no masks be worn for safety of the little ones.  Face paint is okay.  Our quilts will be on display in the Relief Society Room.  We hope that you can come out with your family and enjoy the evening with us!

Saturday, October 6, 2012

2012 Colfax Rail Road Days Quilt Show

Click to play this Smilebox slideshow
Create your own slideshow - Powered by Smilebox
Customize your own digital slideshow


Enjoyed a leisurely walk through the quaint town of Colfax this morning, viewing the quilts hanging out from of the shops.  Lots of fun to hear the comments from folks viewing the quilts and of course we had to spend some time in the Whistle Stop Quilt  & Sew Shop!  So many enticing fabrics and patterns, I could literally spend hours there.  And since Colfax is a railroad town, well, we were treated to several trains coming through during our visit!  Over too quickly, already looking forward to next year!

Saturday, September 29, 2012

Hot Potato Steaming Pocket Tutorial


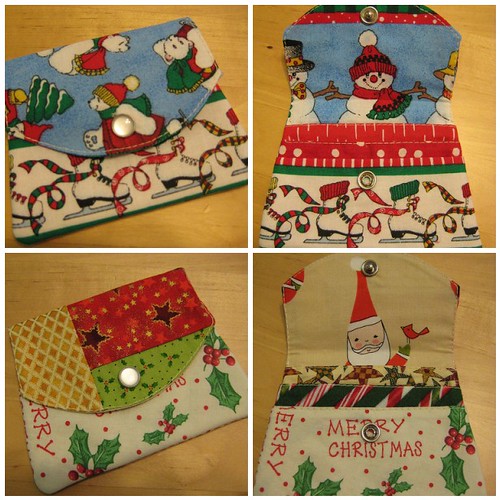
At our Relief Society Super Saturday meeting we made these Microwave Steaming Pouches for Potatoes.

I was suppose to teach the class, but unfortunately, just before things got going, I decided to take a not so graceful fall onto my knee on the cement.  So, limping home I have been laid up for a couple weeks trying to recuperate.  I will not share pictures of the injury...don't worry.  I know most of you would like to keep your food down.   Brenda Allen was kind enough to teach the class for me.   Anyway, if you weren't able to make it to the class, here are the instructions and a mini tutorial.  They are really easy, don't over think the process.  


You will need the following:  

One piece of COTTON batting measuring 10" x 22"
Two pieces of COTTON fabric measuring 10" x 22"
Your sewing machine, some thread.


Layer as follows, batting on the bottom, one piece of cotton fabric face up on top of the batting and the remaining piece of cotton fabric face down on top of the first fabric, as shown above and below:


We are going to sew through all three layers on the short ends ONLY.  It is not necessary to pin, but if you want to do so, I would suggest that you pin as shown below so that your pins are back from the area where you will be stitching, that way you don't have to stop and remove them as you sew or worry about them getting caught under your needle.  Sew 1/2 inch from the short edge on both ends of the fabric sandwich.  Remove your pins.


Put  your hand between your fabric pieces and open it up, as shown below, you should have a loop now.  Turn this loop so that the fabric is on the outside and the batting is on the inside, Press your ends flat and top stitch the ends ONLY.

Notice again, in the picture below, as I am top stitching the ends, my pins are set back so that I have no need to stop and remove them until I am finished.


 Fold one side in and then the other, overlapping the top stitched edges by 1/2 inch.  Make sure that your Longer folded piece overlaps your Shorter folded piece as illustrated below.


Stitch 1/2 inch seam along both sides of your pouch.  I double stitched the area where the pieces overlap as that will be taking the brunt of any stress in opening and closing.    Turn your pouch and you are ready to steam some potatoes to perfection in your microwave!


Share your pictures!  I can see some of you getting very creative with this little project.  Quilting optional, patchwork optional.  Remember since this is going in the microwave, do not use fabrics that contain metallic threads, of metallic designs stamped or embossed on them.  


You may be giving this as a gift, if so, here are the directions for how to use your Hot Potato Steaming Pocket.


To use your bag: wash and dry potatoes, DO NOT PIERCE. Place potatoes in bag and place bag in microwave. Microwave per microwave manufacturer instructions. DO NOT OVERCOOK. This bag will hold from one to four potatoes. This is a great way to cook sweet potatoes.


Tuesday, September 11, 2012

Craftsy BOM Blocks for September and February Remake


February's Block was the Balkan Puzzle.  I wasn't happy with the one I made originally, you can see a picture of it below.  I went in a different color direction and it needed a remake.  I like this one now, it looks like a fire opal from across the room.   I still don't care for the technique because it leaves you with cross grain edges which can be difficult and easily stretched.  Just my personal preference.

You can see how it looks in the grand scheme of things now...


The other two blocks that were made for September are both made using curved piecing.  I love curved piecing and although they are technically perfect...you cannot see the detail of the block because of the choice of fabrics...note to self...more contrast in color and size of elements.  But they are pretty and will blend in so I am not going to redo them.


If you like these blocks and want to make your own...check out Craftsy.com  The course is their Block of the Month and it's FREE!  Lots of fun each month, videos are always there for you to refer to, printed handouts for reference and you can view the contributions of those that are also taking the class.  They have lots of free classes for you to sample and some fabulous pay classes that are very reasonably priced.  The subjects run from cooking to sewing, to quilting, to knitting, you name it!  That's Craftsy.com  check it out!


Monday, September 3, 2012

Quilting Tips


I have finished quilting my Newby Quilting Bee quilt and thought I might share some tips with you as you are starting to quilt your top.  
You will want to quilt your long sashing strips first, this anchors your quilt into nice little sections and makes it easier to get a cleanly finished quilt top.  I elected to do all of my stitching on this quilt in the "ditch" with the exception of the Dresden Fan Block, that block I echo quilted.  I also elected to utilize a clear thread for my top and a muted gray brown for my bobbin thread.  You can do what ever you wish.  There is no right or wrong way.

NOTE:  Before you start:  Make sure your machine is clean, well adjusted, you have the correct thread and sharp quilting needles.  Use a quilt sandwich made from the same materials you are using in your quilt to practice and adjust your stitches before you start quilting your actual quilt.  Good time to adjust your pressure foot also if you need to.

When you are stitching in the ditch, it's nice to have a clear thread so that your stitches do not show.  This method of quilting a quilt, let's your blocks do the talking.  Also, if you are making a quilting to toss over you, you will find that it gives you a softer finish for a more snuggly quilt.  The more you stitch your quilt, the less flexible it will become.  Lots of detail quilting is pretty for an art quilt that you will not actually lay under (a beautiful bedspread that you fold up at night rather than sleep under) or a wall hanging, or a table runner.  Check your quilt batting to see how close you need to stitch to secure the batting and keep it from shifting as you use your quilt.  This is important.  It's not fun to go to all the work to make a beautiful quilt top and then to wash it a few times and notice that all the batting has shifted and you have a lumpy quilt.  All that can be avoided.


Okay, so here is a picture of stitching in the ditch...you will notice that my needle is right in the seam or "ditch".  I use my longest straight stitch and practice on a quilt sandwich before starting out, making any necessary adjustments to tension that may be necessary.  It's good to get all those things sorted out on your practice piece rather than on your actual quilt.  


NOTE:  Take one stitch and bring your bobbin thread to the top as shown above!  Always do this.  You don't want a mess on the back of your quilt to try to sort out later.  This easy step will help you to have a secure and beautifully finished top.  


You will find, as you are working on your quilt, that it will help you to roll up the portion of the quilt that is passing through the neck of your machine as shown above.  It's very important as you quilt that you not have anything dragging on your quilt top.  Sometimes I toss the quilt over my shoulder to support it.  Make sure that it moves easily and that you have sufficient table space surrounding your quilt that it is NOT hanging off the table.  You want fluid motion, not drag.  If you are working on a very large quilt, or have thick batting, you may want to get a couple bicycle clips to hold your rolled quilt in place, back away from your work area.

Once you have quilted all of your sashing, starting with the long strips and then the short strips and the outside, you can then quilt each of your blocks without worrying that things will shift horribly. If you are quilting a large quilt without sashing, just do the same thing, divide it up into sections and get those sections secured, then quilt off those sections.

What do you do with all those threads on the top of the quilt now.  Well, don't just cut them off...as you wash your quilt, your quilting will come undone.  We don't want that.  Take a moment and tie each of the threads into a knot, thread them through a sharp hand needle with a large eye and insert the needle right where your knot is, weave your needle through the batting and out about an inch or two and pull it back up on top, give a gentle tug and your knot will slip into the inside of your quilt and be buried in the batting.  Carefully clip your thread at this point.  See the pictures below. 
Tie a knot close to your top, do not clip threads!
Thread a sharp hand needle with the remain threads.
Take the needed and insert it right where the threads came up and weave it into your batting, do not go all the way through to your backing.  You want to weave out for about an inch or so and then pull the needle and threads up to the top of your quilt again.
Now give a little tug and your knot will bury it self into your batting.

CAREFULLY clip your thread, it will draw back into the batting and should be invisible now.


The next thing we need to do, it prepare our quilt top for binding.  You do this by squaring up your corners using a square ruler and trimming off the side bits that extend out from your top.  (remember, we gave ourselves plenty to work with.)  Use your ruler to measure your side carefully as your are cutting with your rotary cutter and mat. 
Use a square up ruler to square all four corners before you trim off the sides.

Okay, you have this beautiful trimmed quilt, ready for binding and a nice little stack of scrappy stuff left over.  DON'T TOSS THAT OUT!  I will show you what to do with that in a bit.  Don't waste!  Fabric is expensive and you already have the makings of something fun here.  

Before I close...this is by NO means a tutorial on quilting.  Just some quick pointers that work for me.  There are tons and tons and tons of books and websites that offer advanced tutorials and instruction on quilting.  It's an art, it takes practice.  Don't be impatient with yourself, practice does make perfect.  And remember, we have seam rippers, nothing is beyond repair.  Quilting can be and enormous frustration or it can be an exercise in meditation...it's your choice!  Put some beautiful music on that you enjoy and get into the groove!


One last picture...this is the backside of my quilt!  I didn't want to go into town to get backing fabric, nor did I want to spend the money.  The strips are left over from cutting the top and a couple extra blocks, cobble them together and you have the back.  Your back may be one solid fabric, or you make choose to do something fun on the back.  It's always your choice!  

We will be meeting this week on Thursday and Friday September 6th and 7th from 9am to noon to help you get your tops quilted and ready for the final step of binding!  Then the following week, on Friday September 14th from 9am to noon, we will tackle binding and inserting sleeves if you wish to display your quilt.  You are almost finished!!!


The Seventh Annual Colfax Outdoor Quilt Show will be held on Saturday October 6, 2012 from 10am -4pm in the little town of Colfax, CA.  Entries must be submitted by September 21st to be considered for the show.  Your quilt must have a 4" rod pocket and there is a $5.00 entry fee.  I hope you gals will consider entering your quilts in the show.  It's lots of fun to see your quilt on display and to hear the lovely comments from folks as they walk by.  If you are interested,  I will have entry forms at the meeting Thursday and Friday or you can contact me and I will get one to you!

Here is a link for the Whistle Stop Quilt and Sew Shop:  http://www.zoomaru.net/index.php?id=0&display=portal&eportal=whistlestop

They have a great calender of events coming up and some really lovely fabrics in their shop.  If you have been wondering about machine maintenance, they have a special class you can take. Suzanne Maguire and her husband Larry have just celebrated their 5th year in business at that location.  Please support them when you are in Colfax.  

Remember these?  Well read below to see what you might do with your trimmings!


Here is what I did with the left over scraps from trimming the batting and backing from my quilt.  I cut all the pieces 12.5 inches long.  Took a piece of fabric from my stash for the back and laid the strips and the batting down until I covered what I wanted.  Then I flipped only the fabric strip over and stitched them right sides together all the way through to the backing. Your bits of batting will be secured with the stitching, you can just butt them right up to each other and pin them in place until you get them stitched.   When it's all covered the size that you want, trim it up and bind it.  You can make a fun table runner or book cover this way...or even a piece of fabric that you could use to make into a tote!  The possibilities are endless.  Just have fun!  


Trimmed into 12.5 inch strips

lay them out in a pleasing manner.

Stitch them to a piece of backing fabric, bind them and you will have some fun snack mats.