

In the center of the Swoon block, there is a Lemoyne Star. I love the Swoon Pattern by Camille Roskelley....

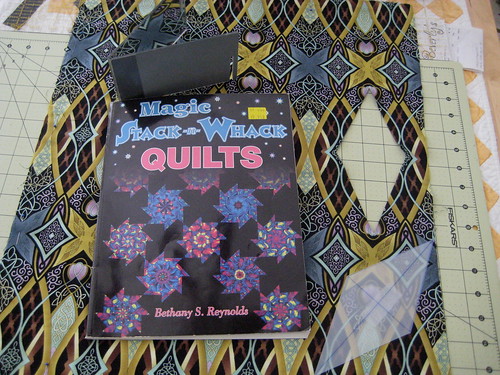
...but wanted to take it a bit further and create some interest in the center by using the Stack N Whack method as outlined in the book Magic Stack n Whack by Bethany S. Reynolds. I have had so many requests for additional information on this that I am blogging it today.

To get started you may want to get a copy of her book which also has a number of other stack ideas and options. You may also want to use some template plastic, some scotch tape, a fine tip permanent marker and two mirrors which you can attach on the backside with duct tape. (you'll see as we go along how these are useful)
Step one is to select a fabric that has sufficient repeats for your pattern. I need 8 pieces to make my star so I need 8 repeats of my fabric. I purposely selected a fabric with close repeats. That means that instead of seeing that image once every 36 inches, I am seeing it once every 4 inches. This lets you get a lot of bang for your buck as you will not have to purchase so much yardage to achieve your design.
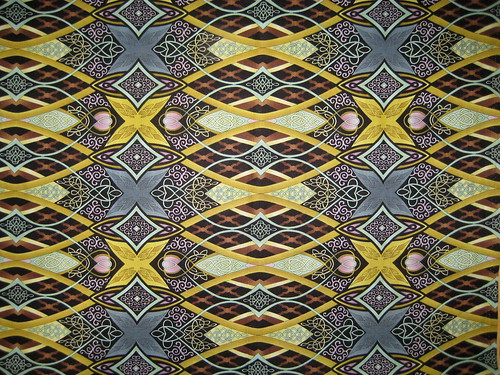
The fabric I selected is called Deja Vue by Paula Nadelstern. Google her, you will be amazed at her work, it is something to aspire to.
Okay, now that I have picked out my fabric, I am going to cut 8 repeats and stack them one on top of the other. I will carefully stick a fine point pin though an element in the design which I can easily match up. I will match this up through all eight layers. Then, holding my pin perpendicular to the fabric I will carefully pin next to it through all layers to secure it. I will do this in several areas around the fabric.

Okay, right about now, I can hear you saying, this is way to much work. Well, it's not and it's worth it. All the hard part is at the front end and if you take your time and carefully do your pinning, you will have stunning results and you too will be hooked!

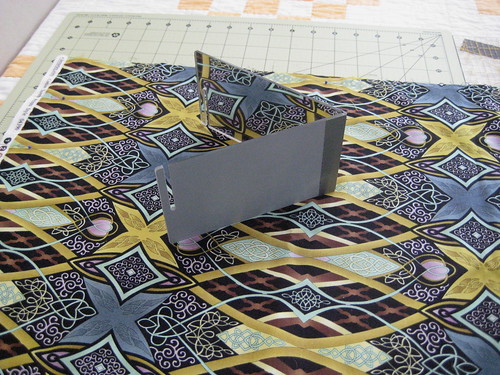
Once you have everything pinned the way you want it, take your two pieces of mirror and duct tape them together on the backside of one short end. They sometimes come with a slit so you can just hook them together, but for this project, duct tape works better as it allows more flex in the range of motion. (you can purchase these at Joann's, Beverly's, Online at Connecting Threads, Amazon, just about everywhere)
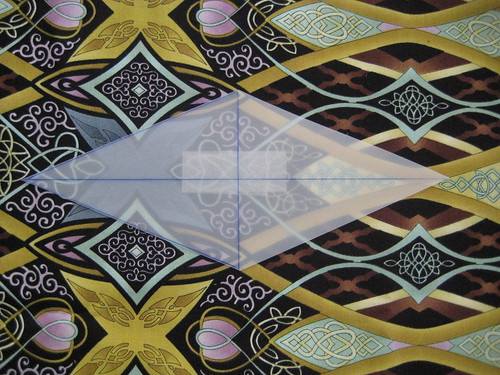
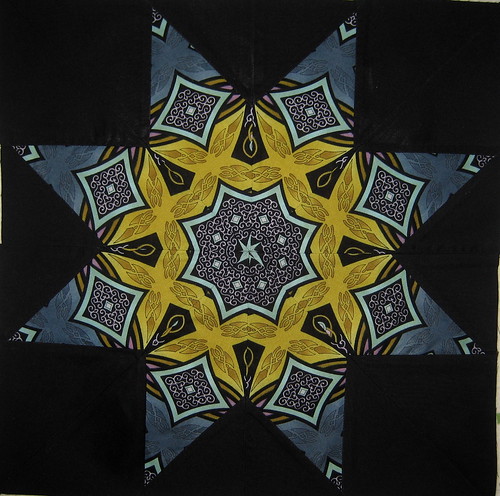
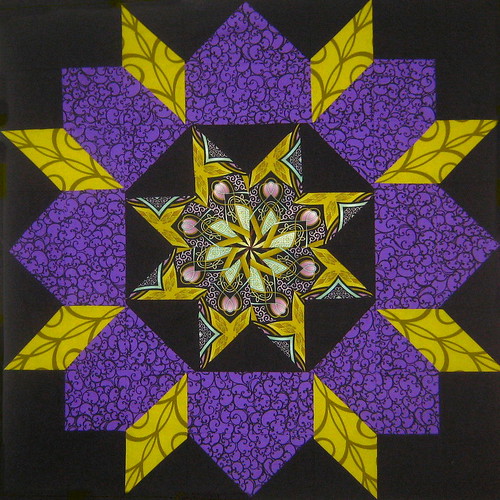
Now you can pick out something on your fabric that looks interesting, and using your folded mirrors, slide them around till you get an effect that you like. Below I have placed the mirrors on the fabric and I am just sliding them back or forward a bit to change the image, or side to side.
Here are the images in the mirror.

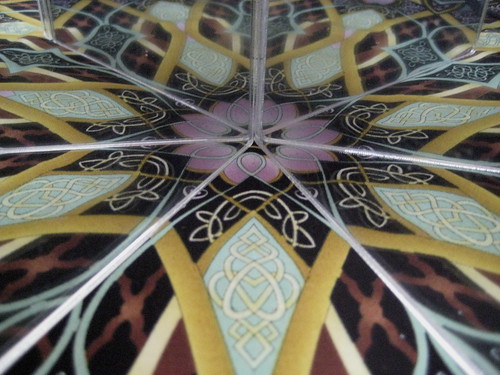

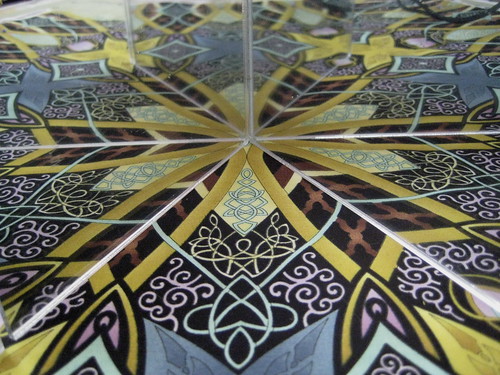
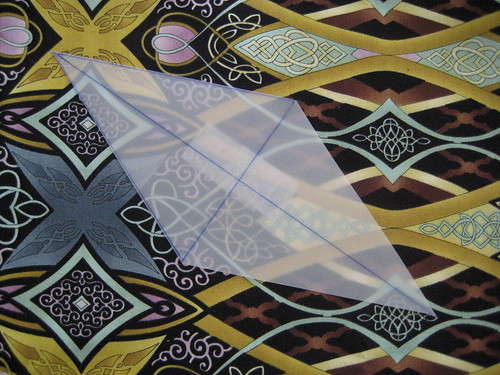
Okay, so you get the idea, this is all from the exact same fabric! So you have found a design that pleases you. Now what? Well, in the book Stack n Whack, Bethany Reynolds has kindly printed templates. Get yourself an old school folder, a piece of translucent plastic from an old can lid, or milk carton...or if all else fails, you can purchase template plastic. Use a ruler and trace the template onto your plastic and carefully cut it out using an old rotary cutting blade (I save my old ones for this or cutting paper) Now you have your template. Take your ruler and the permanent marker and draw from tip to tip in both directions. This will help serve as a guide. Get your scotch tape and make a loop, stick it to the underside of your template. This way you can put it on your fabric, move it around and when you are ready to cut, there is nothing to pin!
The plastic is just see through enough to let you see what is on the fabric and line up your design. You can also randomly place your template, which I did in some of my blocks, and it will give you a rotating effect in the fabric.
Once you have your template in place, carefully place your ruler along the edge and cut your fabric with a rotary cutter, this way you are not cutting your template, your template should be underneath your ruler. You will end up with 8 perfectly matching pieces!
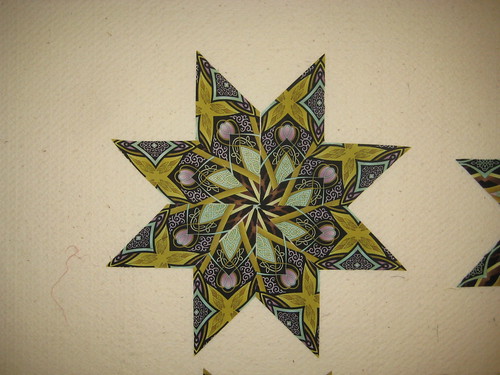
When you are all done cutting your bits out, you will have some swiss cheese looking fabric, but you will have some amazing blocks!

You could stop here, make several stars and put together a beautiful quilt. I am continuing on to make my version of the Swoon!
The next step in this process, is to turn these into "Swoon" blocks.
More to be revealed!!!
I am getting online and ordering it all right now...this is amazing! Thank you for the step by step! Cannot wait to see your quilt! Just wow!
ReplyDeleteYou will have so much fun with this. Her books just open up a whole new way to look at fabric. Be sure to share, I want to see what you create!
DeleteLove this tutorial. I have always been fascinated with stack and whack but have never tried it out.
ReplyDeleteGreat tutorials!!! Love your newly found blog!!
ReplyDelete